There is never a right or wrong way to cook a recipe. It all depends on how and what you want to eat!!!
This is an amateur cooking guide, who wont hesitate to try new recipes.
I am starting to write this blog with the only intension that this will help out so many other home cooks. I call my blog as my cooking experiments, since no one is perfect ( I am no where near perfection 😛 ), but thanks to internet, helped me to gain some confidence in myself in cooking.
My recipes will be from elders who taught me cooking or my own experiences or from other blogs (credits will be given) . I have done many trial and errors and that’s why I would love to give some of my tips in the recipes I have tried.
I am more than excited to give my piece of something to those like me.
So lets get started with cooking . . .
This is the first post on my new blog. I’m just getting this new blog going, so stay tuned for more. Subscribe below to get notified when I post new updates.
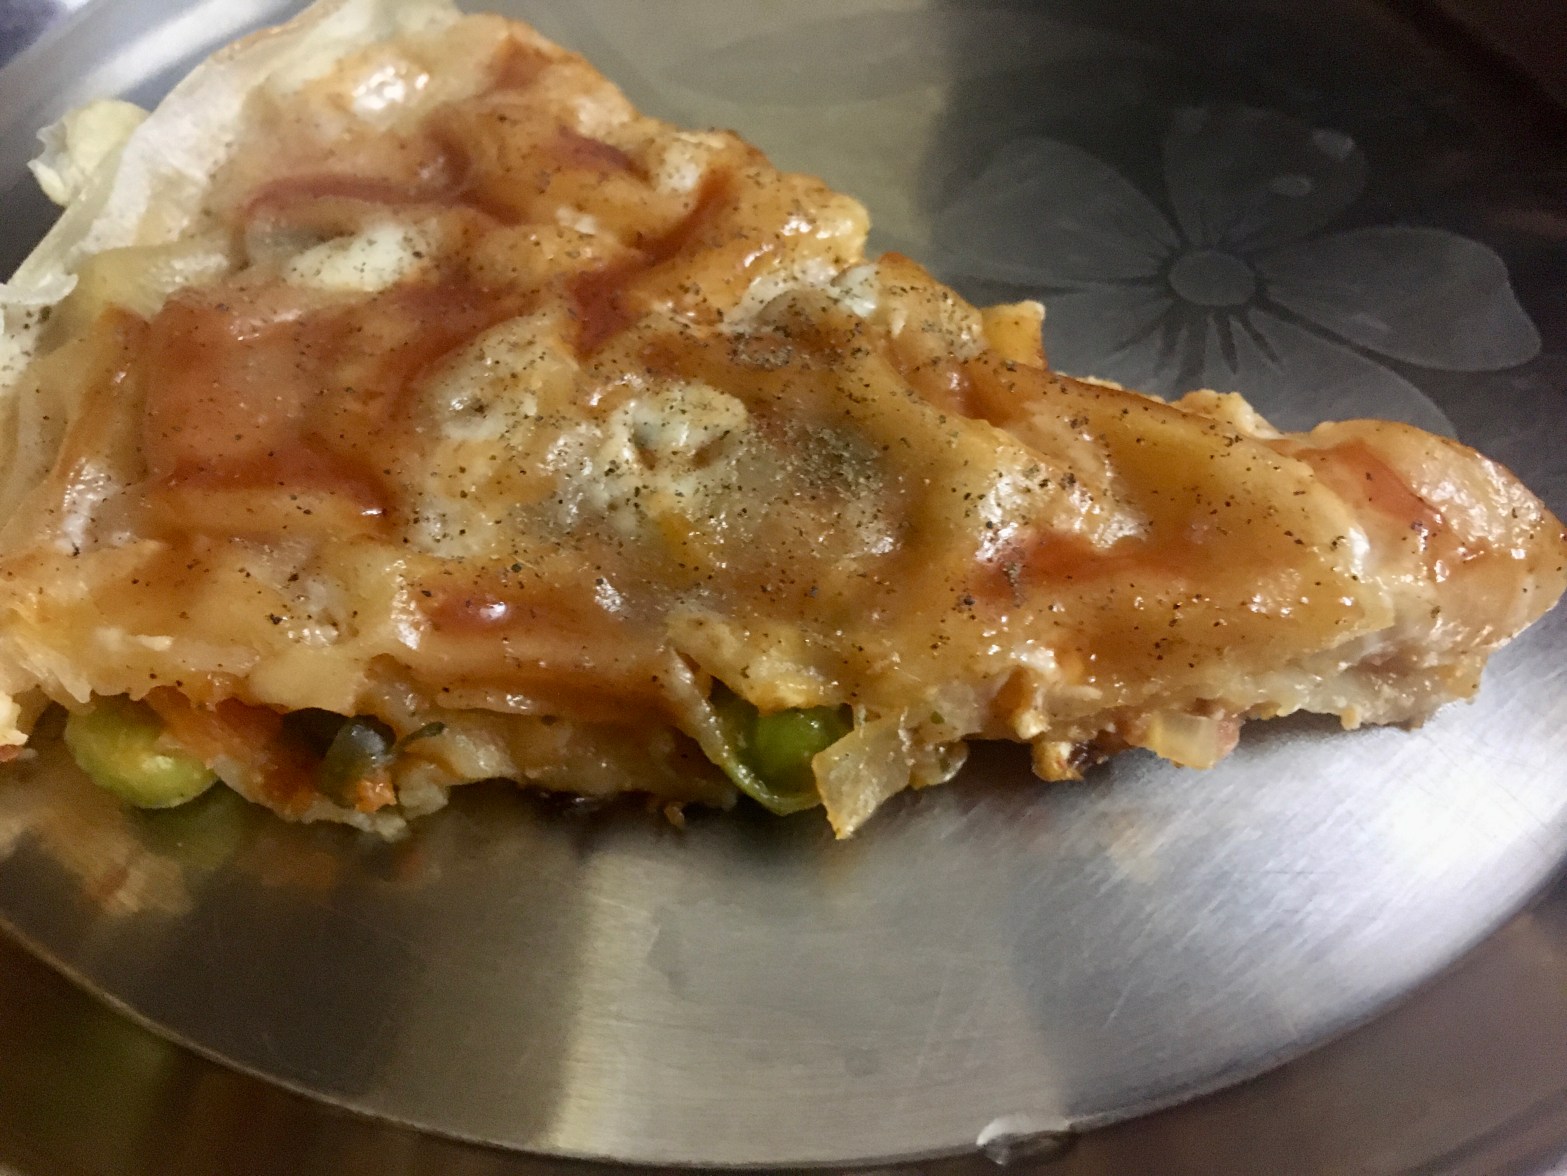
This is an easy vegetarian lasagna recipe that I picked from YouTube. I have made the recipe from scratch, including the sheets. It a bit of hard work, but its completely worth it. Usually, Lasagna sheets must be cooked separately and then baked it oven. But I have tried out a different version. I have made thin lasagna sheet and pan cooked in a stove. I want the preparation to be simple, so that everyone could try at home.
Don’t forget to check my tips after the recipe. Lets get cooking!!!
INGREDIANTS:
For Lasagna sheets: All purpose flour/maida – 1 1/2 cups Salt – 1 teaspoon Oil – 2 tablespoons Water as required
For the filling: Tomatoes – 2 to 3 Ginger and Garlic – 2 tablespoons Onion – 1 medium sized Vegetables of your choice: Beans, Carrots, Green peas Oil – 1 1/2 tablespoon Red chili powder – 1 teaspoon Oregano – 1 teaspoon Salt as required
Grated cheese – 1/2 cup
PREPARATION:
Lasagna sheets:
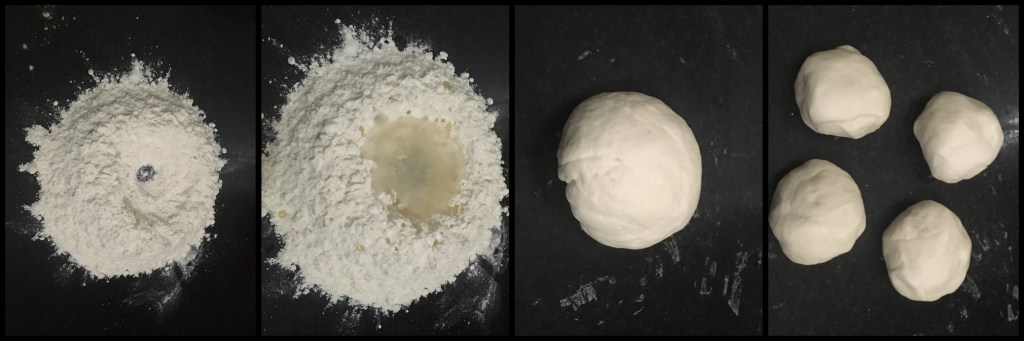
Take all purpose flour, salt, oil and add water little by little to make it a soft dough. Knead it for 5 mins. Divide the dough into 4 portions equally and let it rest for about 20 mins. Cover it with a wet cloth to rest the dough.
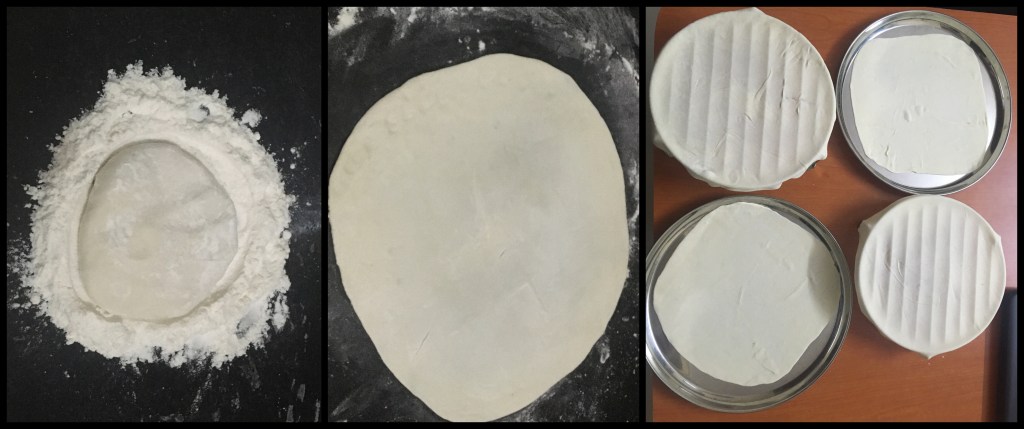
After resting, take one portion of dough and roll it into a thin sheet. Add dough while rolling, so that it doesn’t stick to the bottom. Make sure that the sheets are of the size of your pan. Otherwise trim the sheets to the correct size of the pan and then dry them.
Take the sheets in a cooking rake or a greased plate and place them to dry for about 20 mins. They will become firm and translucent once dried completely.
While the sheets are drying, lets prepare the filling.
Preparing the filling:
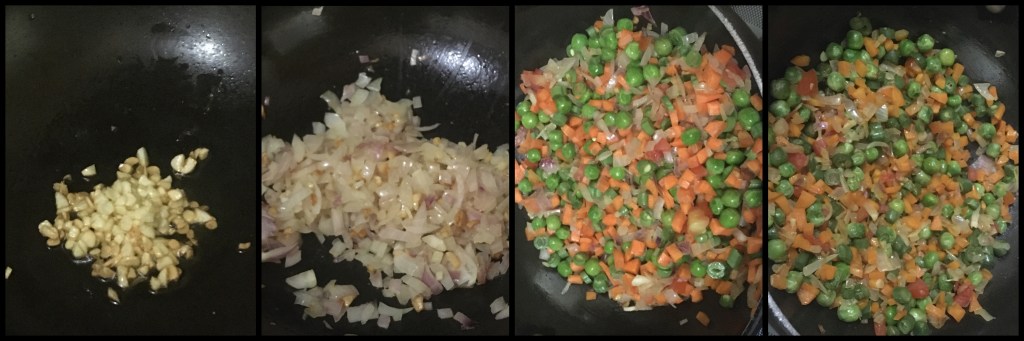
In a pan take oil, add chopped ginger and garlic and sauté for one min. Add finely chopped onions and fry until it turns transparent. After that, add the vegetables one by one to the pan. Fry them until they are half cooked. Also add required salt.
Meanwhile, roughly chop the tomatoes and grind them to a smooth paste and keep it ready.
Once the vegetables are cooked, add the tomato puree to it. Mix well. Also add salt, red chili powder, oregano to it. Mix them all well. Cover it and cook it for 5 mins in medium flame. Once the gravy is cooked, add half cup of water could be added if its too thick. Cook it for another 5 mins and keep this mixture aside.
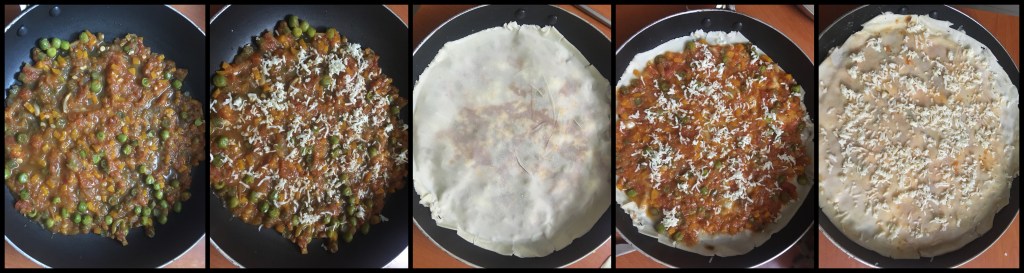
Assembling the lasagna:
Take the pan you wish to cook the lasagna. Add a layer of gravy or filling first. Sprinkle some grated cheese. On top of it, place one dried lasagna sheet. Add the gravy or filling on the top of the sheet, then grated cheese. Repeat the steps until you place the last sheet. You can finally add grated cheese on the top as a final layer. Additionally you can also add tomato ketchup on the top.
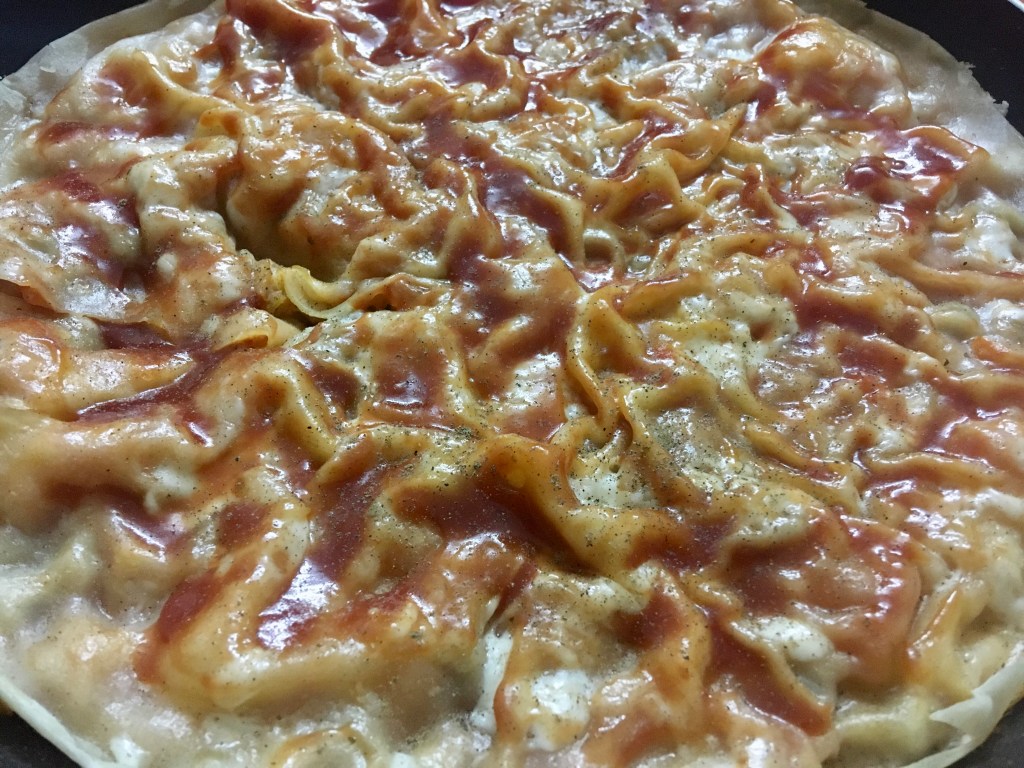
Place this pan on a low flame on the stove for about 15 to 20 mins. The cheese gets melted on the top and the sheets will be cooked.
Serve the lasagna hot with tomato sauce or ketchup. Also sprinkle some black pepper powder, chili fakes or oregano if you like.
TIPS:
Make sure that the dough is soft and rested well.
If the dough seems to be sticky, add oil and knead. The more you knead , the softer the dough will become and less sticky.
While rolling the dough, the all purpose flour has the tendency to shrink after stretching, so roll as thin as possible.
Also, since we are not cooking the sheets, it is important for the sheets to be thin.
If the sheets are placed in a non greased plate, it might get stuck and you wont be able to take it out. Preferably use cooking rake for drying them.
For the filling, vegetables are of your choice.
You can also add red chili flakes to the gravy mixture and also at the top.
The gravy needs to be watery, so that the sheets observe the excess water and cooks well.
The number of layers of the lasagna is absolutely your choice. The more that better.
Remember, the key is to taste the dish at every stage and experiment with it. Let me know in the comments below about your experiment with this recipe.
Please do like and share this recipe. Happy Cooking!!!
I had this Sabudana or Sago pearls at my place. I was thinking of preparing this sweet for a long time. Sago are starchy to work with, so I was little hesitant. But, it will be like small jelly balls when cooked in water. I found this perfect recipe online and made my own version.
Sabudana refers to the starch that is extracted from tapioca roots, which is then processed to form spherical pearls that may vary in size. The pearls are produced by passing the moist starch through a sieve under pressure, and then dried. It contains a decent amount of potassium that helps to keep your Blood pressure in check. It promotes healthy blood flow and lowers the strain in your heart. Helps fight birth defects. Sabudana is a rich source of vitamin b6 and folate. (Source: Google)
Don’t forget to check my tips after the recipe. Lets get cooking!!!
Cup Measurement: 240 ml cup
INGREDIANTS:
Sabudana or Sago pearls – 2/3 Cup Water – 1 3/4 Cups Sugar – 1 Cup Milk – 1 litre Ghee or clarified butter – 1 tablespoon Cashews and Raisins (Your choice of nuts) Cardamom powder – 1 teaspoon
PREPARATION:
Take Sago pearls and wash it thoroughly. Soak it in water for about 45 to 60 minutes. We will be using the same water to cook it, so use drinking water for soaking. The sago must become soft before its cooked.
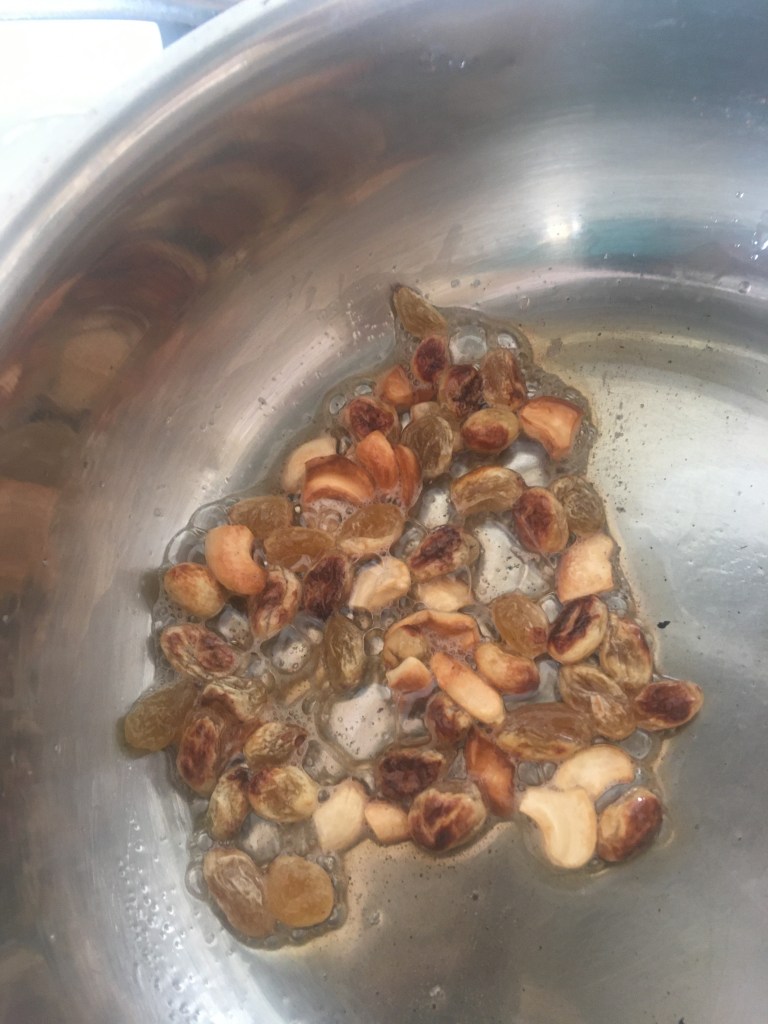
Meanwhile, take a pan and fry some cashews and raisins with ghee and keep aside for later.
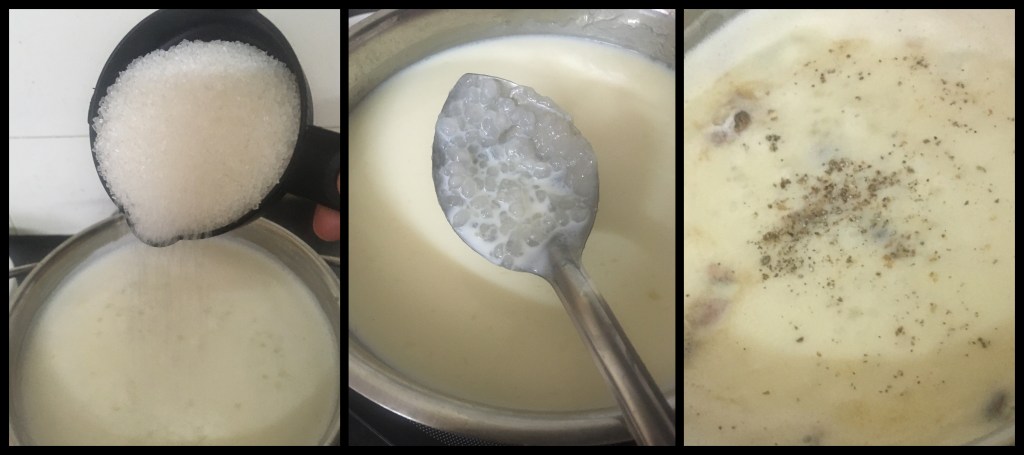
In the same pan, take the soaked sago with water and cook until they turn transparent. It takes about 15 to 20 mins. Keep stirring the starchy mixture, so that it doesn’t stick to the bottom of the pan and burn.
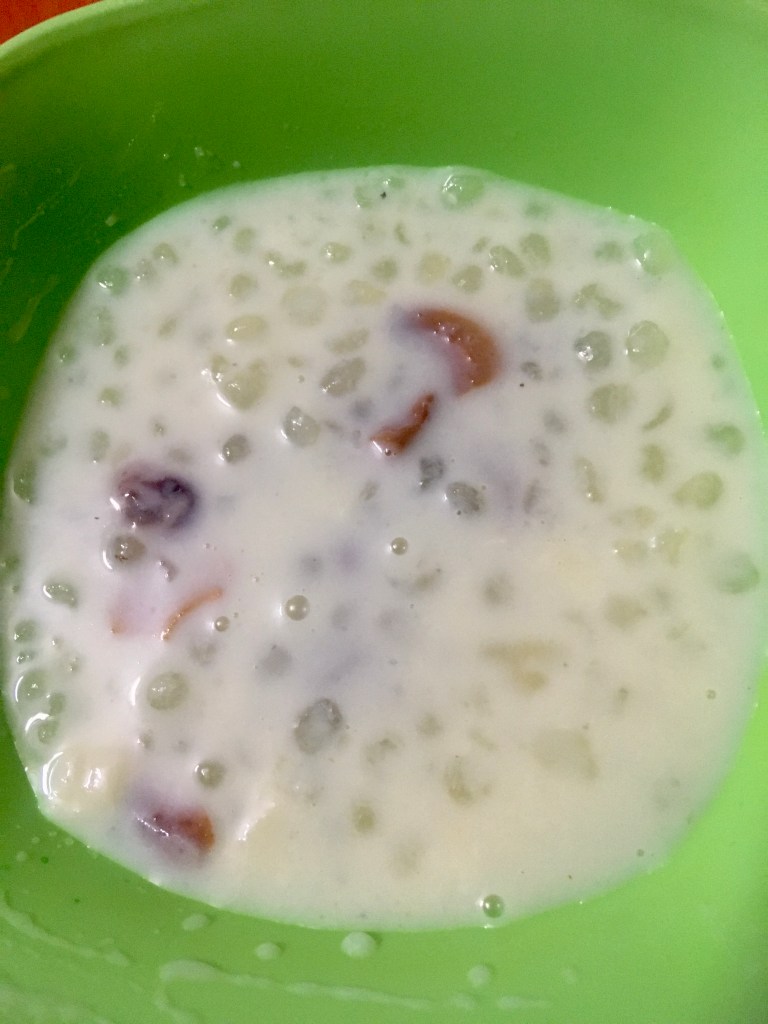
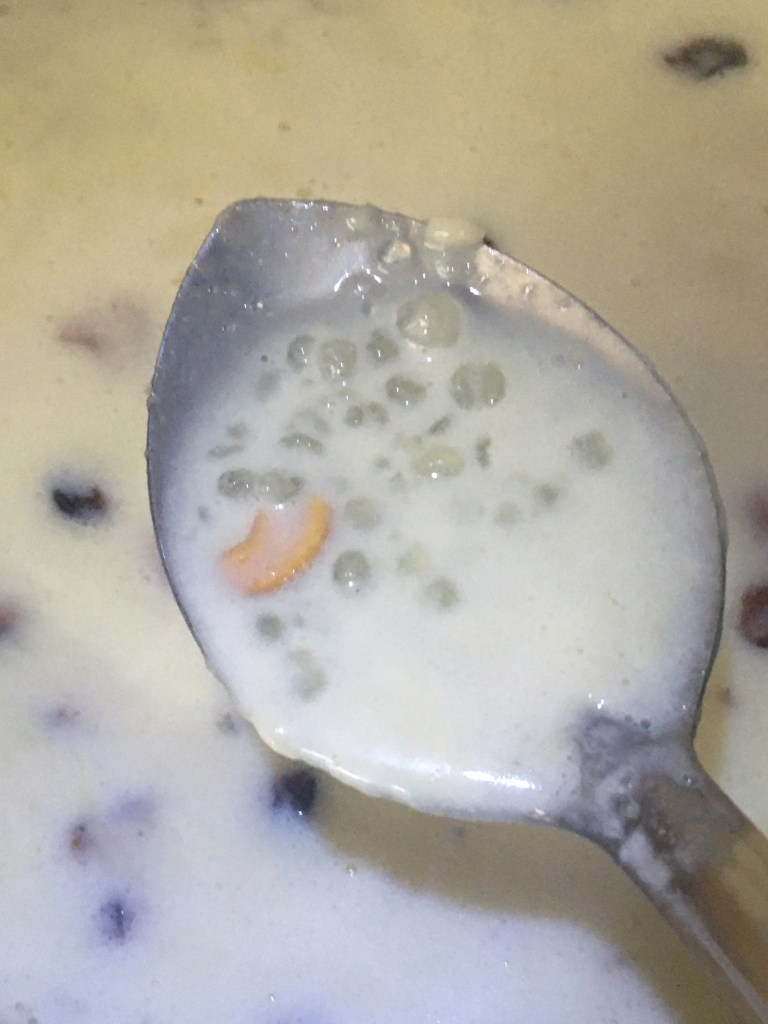
Once cooked, add milk and bring it to boil. And then simmer it and allow to thicken. Keep stirring occasionally. Let it simmer for at least 10 to 15 minutes further.Then add sugar and dissolve in it. Let to boil for 5 more minutes.Then add cashews, raisins and cardamom powder to it.
Bring it to boil and switch off the heat. You can serve this hot or cold.
TIPS:
Soaking Sago will reduce the cooking time. The time of soaking the sago differs according to the quality of it.
The soaked water of Sago has starch in it, so I prefer not to throw it away.
Stirring the sago while its cooking is a important step to avoid sticking to the bottom.
At the end, the mixture will thicken once it cools down. So don’t worry if you feel like there is excess milk in the porridge.
You can increase or decrease the sugar level as per your sweetness level.
Remember, the key is to taste the dish at every stage and experiment with it. Let me know in the comments below about your experiment with this recipe.
Please do like and share this recipe. Happy Cooking!!!
Palak paneer is a vegetarian dish originating from the Indian subcontinent, Palak, in Hindi, means spinach and paneer means cottage cheese, so ‘Palak Paneer’ is a spinach curry with sautéed paneer. This dish originated in the Punjabi region but different variations are popular all over India. Palak paneer may be called green paneer in some restaurants. (Courtesy: Wikipedia, Google)
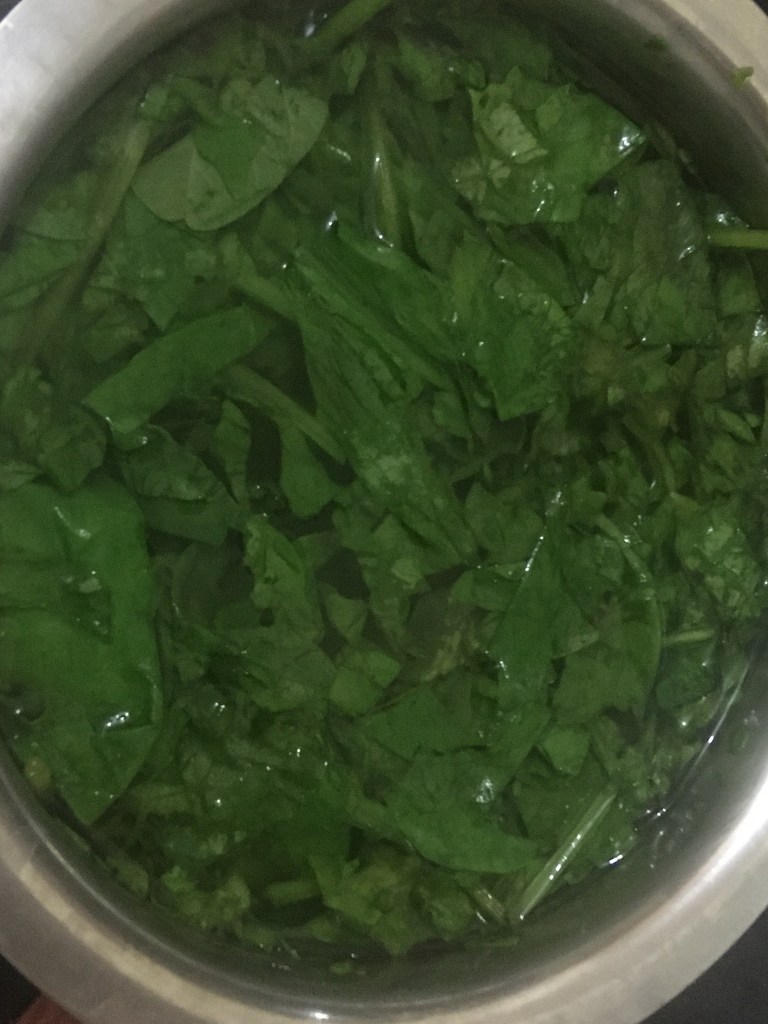
This recipe requires the green leaves to be blanched. Blanching your vegetables, which is when you quickly cook vegetables in boiling water, and remove them when they’re still very crisp, to help preserve the colour and nutrients. It stops enzyme actions which can cause loss of flavour, colour and texture. Blanching cleanses the surface of dirt and organisms, brightens the colour and helps retard loss of vitamins.
Don’t forget to check my tips after the recipe. Lets get cooking!!!
INGREDIANTS:
Palak or spinach – big bunch (only leaves removed) Paneer or cottage cheese – 200 grams (Cubed) Ghee – 2 tablespoons Tomato – 1 medium size Onion – 1 big one Green chillies – 2 Ginger – 1 inch long Garlic – 4 to 5 pods Jeera seeds – 1/2 teaspoon Coriander leaves – Few leaves Sugar – 1 teaspoon Water as required Salt as per taste
PREPARATION:
Blanching the Spinach:
Bring 1 litre of water to boil in a vessel. Switch off the flame and bring the vessel down. Now we need to blanch the spinach in this hot water for 5 to 10 minutes, until the spinach changes colour. Strain the spinach and let it cool completely. Do not cook the spinach at this point.
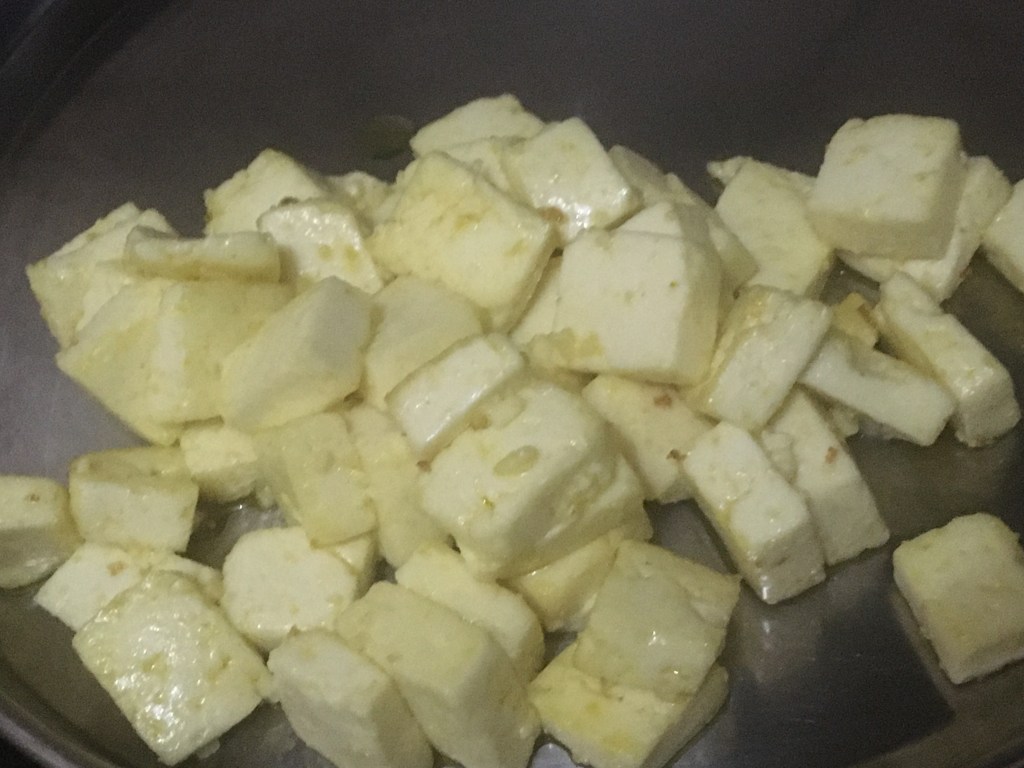
Frying the Paneer:
Meanwhile, take a pan and add 1 tablespoon of ghee or oil. Now fry the cubed paneers in it. Keep stirring and do not allow it to burn. Once it turns light brown, turn off the flame and keep it aside.
Assembling the gravy:
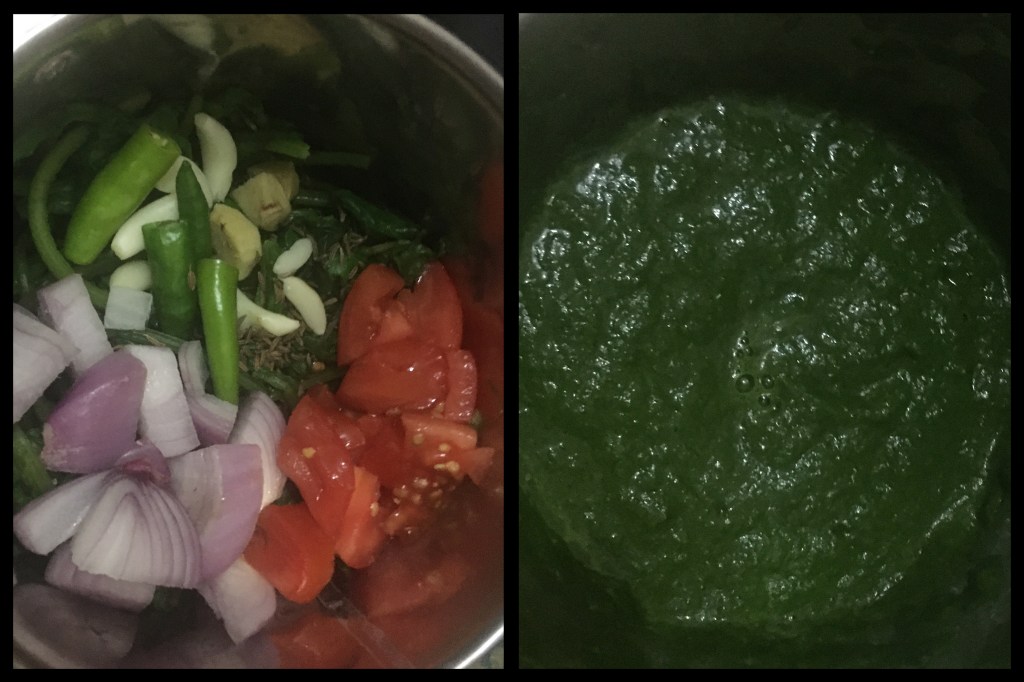
Take the cooled spinach in a mixer grinder. To this add half tomato, half onion, jeera, ginger, garlic, green chillies, coriander leaves and half cup water. Grind to a smooth paste. Keep it aside.
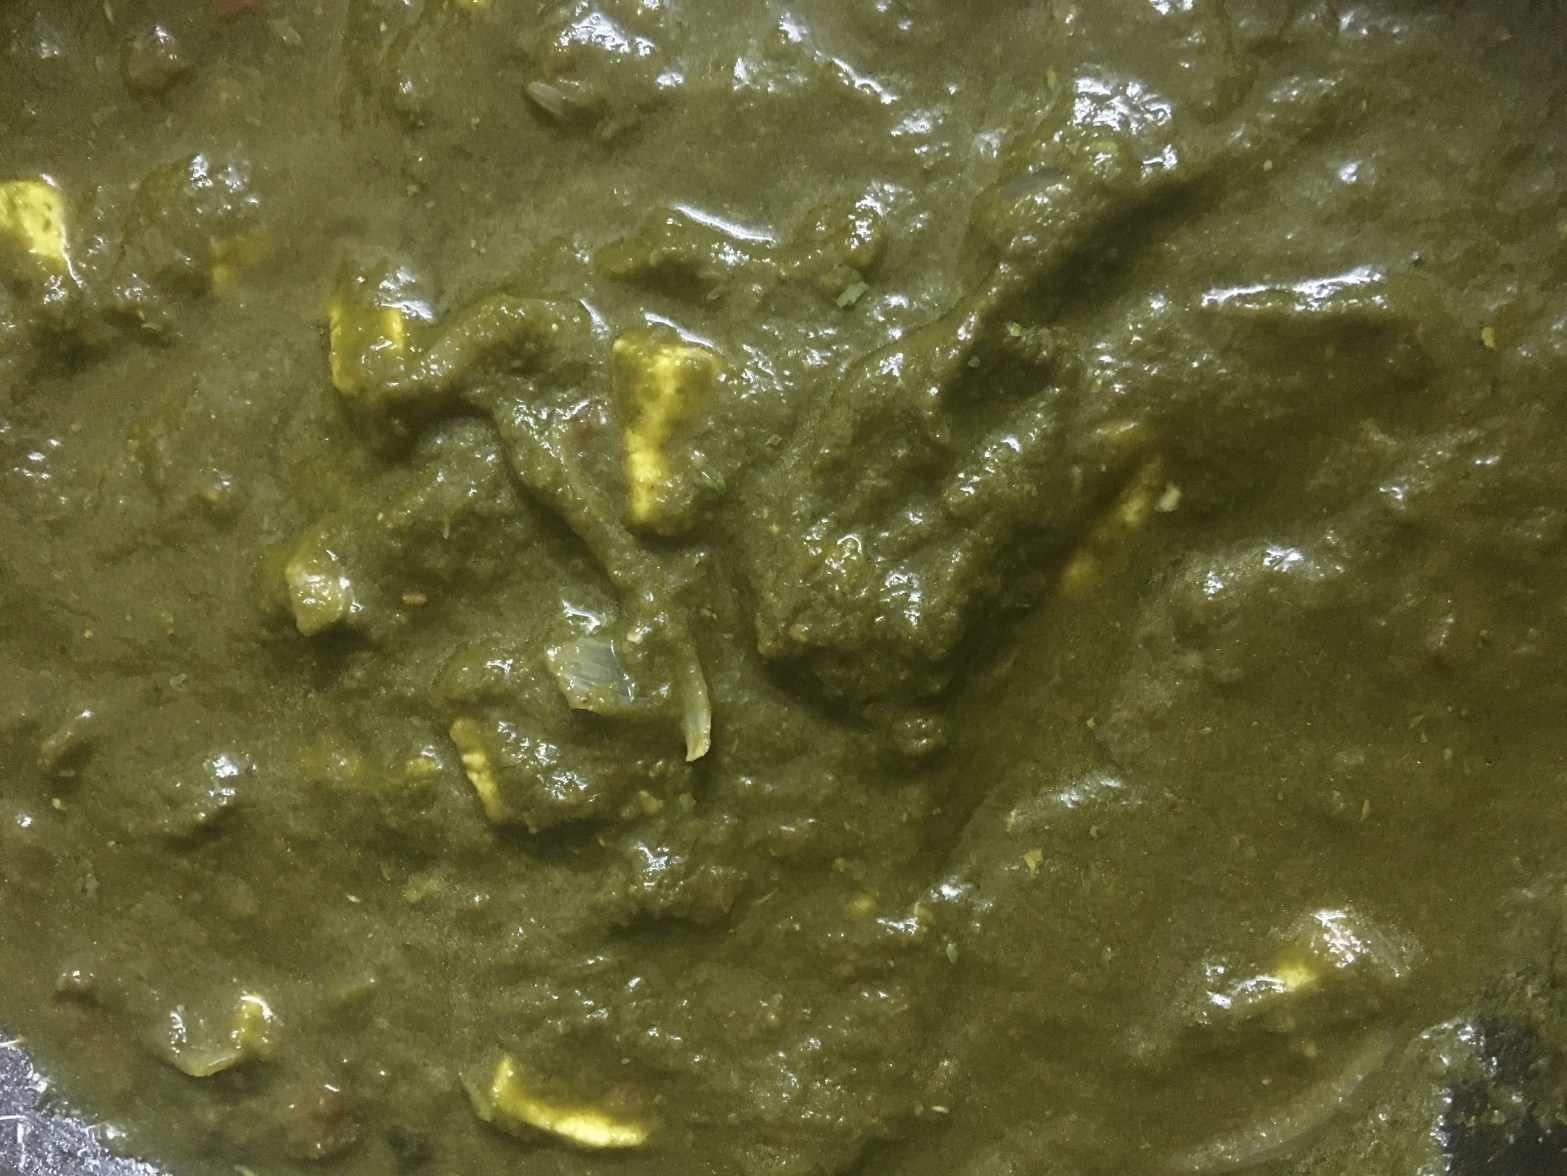
Meanwhile, in a pan, take 1 tablespoon of oil. Once its hot, add half of chopped onion and fry to golden brown. To this, add half of tomatoes and cook until it turns soft or mushy. Once done, add the grinded spinach gravy from the mixer. Mix well and let it cook for 2 to 3 minutes. Now add sugar and mix well. Add salt and cover it and cook for 5 more minutes. Once cooked, add paneer and mix well. Bring it to boil and switch off the flame.
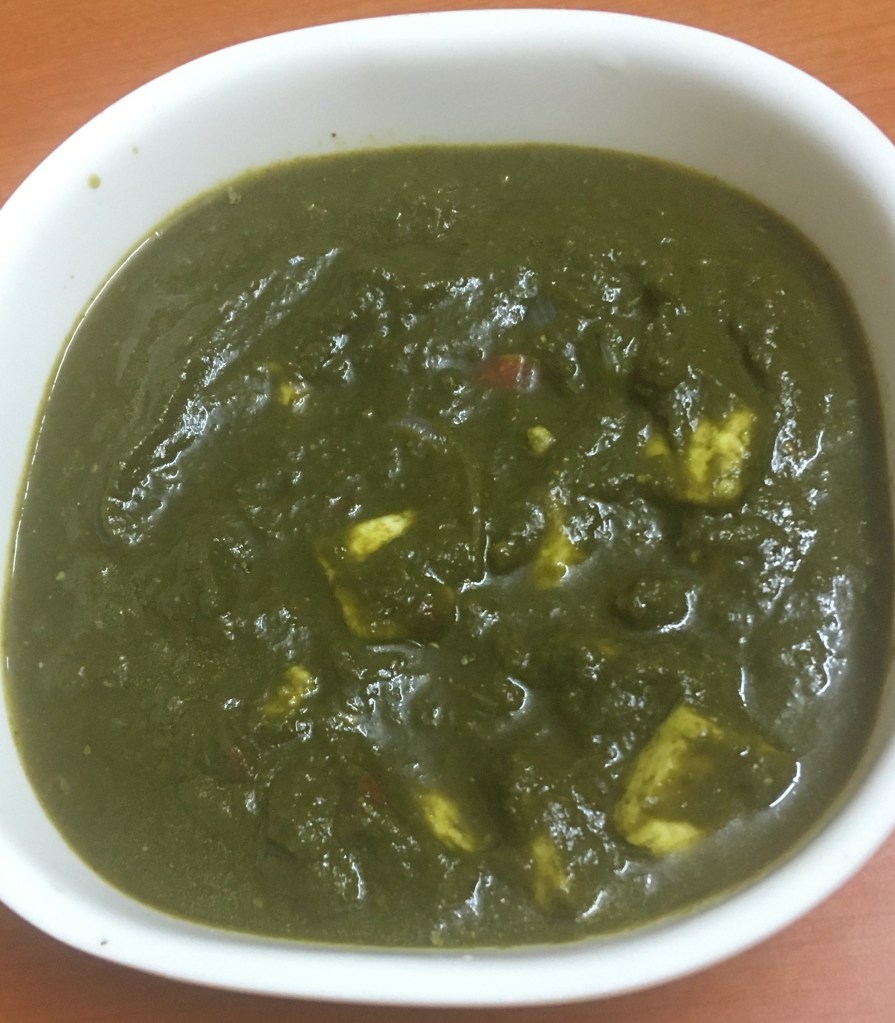
Serve it hot with Roti or Chapathi and curd.
TIPS:
– Blanching helps to return the vitamins, so its important not to cook the spinach leaves directly. – frying the paneer cutes with ghee or oil will help in retaining the shape of the paneer and it wont crumble while mixing. – adding sugar will enhance the flavour and mainly retain the colour of the spinach. – adjust the gravy consistency by adding more or less of water. additionally you can add fresh cream at the end and mix well for a thick gravy. – spiciness and salt with differ from person to person, so please adjust to your taste.
Remember, the key is to taste the dish at every stage and experiment with it. Let me know in the comments below about your experiment with this recipe.
Please do like and share this recipe. Happy Cooking!!!
This is my friend’s recipe. I went to my friend’s place for lunch and she prepared this amazing vegetarian food. I was surprised how simple and yet complex this recipe was with so many ingredients and vegetables coming well together. The entire house will be filled the aroma of this dish when you prepare.
People might argue saying vegetarian food cannot be called as biriyani. But that’s how my friend called it and thus keeping the same name. I thank her for sharing this amazing recipe which I have tried many times and everyone loved it.
Don’t forget to check my tips after the recipe. Lets get cooking!!!
INGREDIENTS:
Basmathi rice – 1 cup Onion – 2 Tomato -2 Green chili – 2 (Slit) Turmeric powder – 1 teaspoon Red chili powder – 1 teaspoon Garam masala – 1 1/2 teaspoons
Oil/Ghee/Butter – 1 tablespoon (may require more) Curd – 1/3 cup Cashew paste or malai or cream – 1 tablespoon Lemon Juice – 1 tablespoon
Salt as per taste
For Garnish : Onions and coriander leaves.
PREPARATION:
Wash the basmathi rice well and soak it for about 20 to 30 mins. Drain and keep it aside. Meanwhile chop all the vegetables and keep aside.
Boil 2 to 3 cups of water in a vessel, with one teaspoon of salt. Add the soaked basmathi rice into it. Cook it in medium to high flame for about 10 mins or until till half cooked. The rice should most double its size. Switch off the flame, drain the water and run the rice is cool tap water to avoid over cooking it. Keep it aside.
Meanwhile lets prepare the masala.
In a small kadai, take oil. Add biriyani leaves, cardamom, clove, star arnasi, fry for one minute. Add chopped ginger and garlic and green chilies, fry for one more minute. Add chopped onions. Fry until onion turns transparent. Add chopped tomatoes and fry until it turns mushy. Add all the vegetables with salt and cooked it with lid closed for about 5 to 10 minutes. Also add roughly chopped mint leaves. You need to half cook the vegetables and keep stirring occasionally to avoid from burning.
Add turmeric and chilli powder and give it a good mix. Add curd and mix well. Finally add malai or cream and give it a good mix. Switch off the stove and keep this mixture separately.
Assembling:
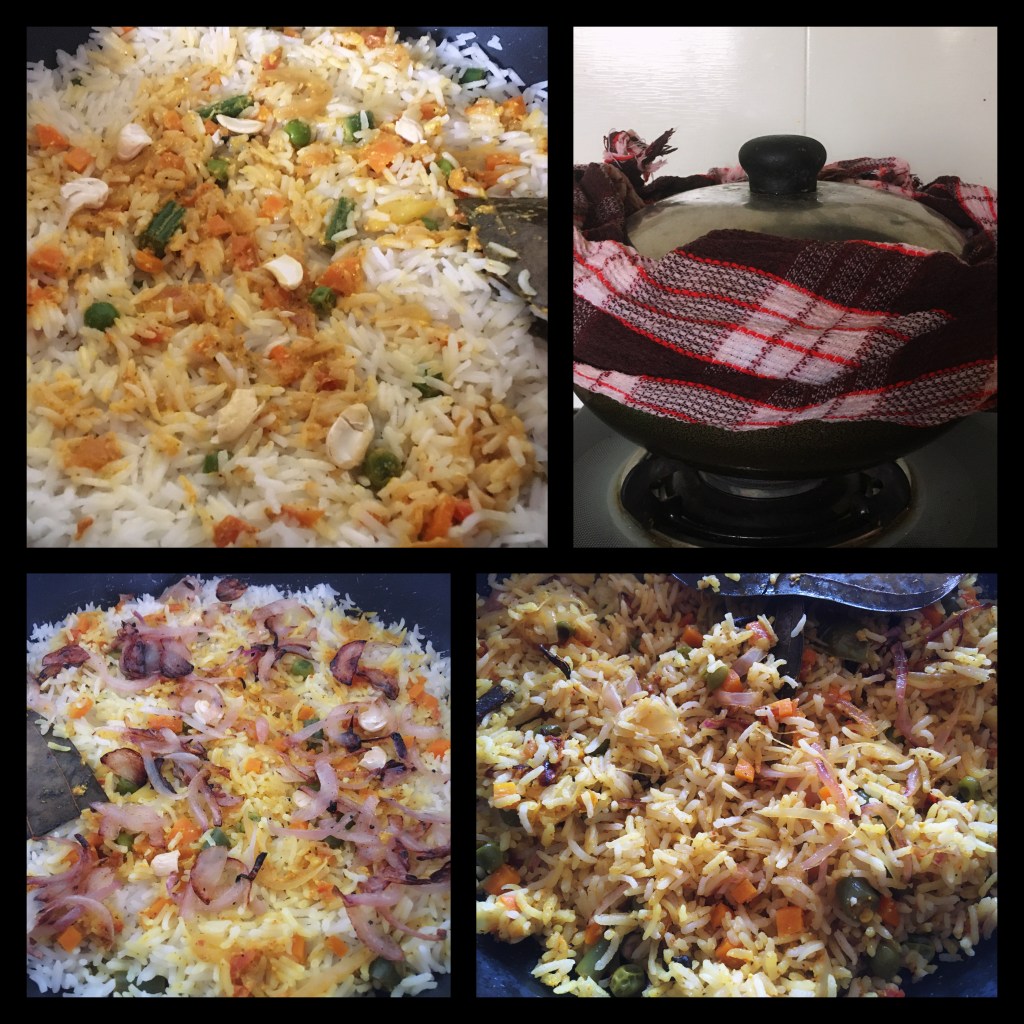
Take a thick bottom kadai or non stick pan or pressure cooker. Add 2 to 3 tablespoons of melted butter. Do not switch on the heat. Add a layer of vegetable mixture. Add a layer of rice. Repeat the process.
Cover the pan with the lid and wrap a wet cloth to avoid any steam from coming out. Place this on the stove and keep it in low heat.
Let it cook for about 10 to 15 mins. Switch off the flame and let it sit for 10 mins.
Meanwhile, fry some chopped onions until they caramelized with some oil. Keep it aside to garnish.
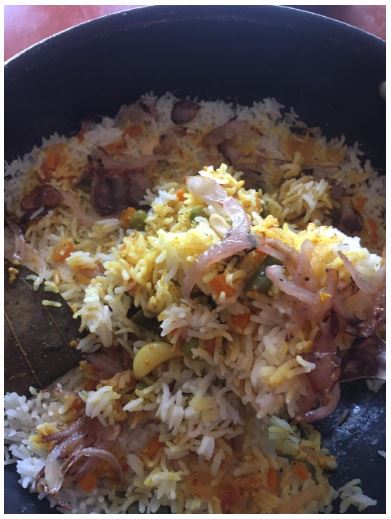
After 10 mins, remove the wet towel, open the lid and garnish with caramelized onions and coriander leaves.
You can mix the layered rice well and serve it hot with curd or raita or chips.
TIPS:
– make sure you keep mixing the rice occasionally while cooking the basmathi rice in water. The rice may settle at the bottom and stick to it. – do not cook or heat the curd for a long time. It will curdle. – additionally, you can add mint leaves while layering to give that extra flavor. -it is important to add the ghee or butter at the bottom of the pan to avoid the vegetable gravy from burning at the bottom. – the cooking time after assembling depends on various factors (like the thickness of the kadai or amount or oil/butter), so keep a check for burnt smell in between. – a thick wet towel will give a good dum effect and will enhance the flavors of the gravy and rice. It can be prepared without this as well. Just cover the kadai without the cloth.
Remember, the key is to taste the dish at every stage and experiment with it. Let me know in the comments below about your experiment with this recipe.
Please do like and share this recipe. Happy Cooking!!!
I had this tangy mango at home and was wondering what can I prepare from them. Instantly I consulted with my mom and she gave me a simple pickle recipe. Pickles usually will take days to prepare and there might be long elaborated steps in preparing. This recipe is tasty, spicy and easy to prepare with less ingredients that are available at home.
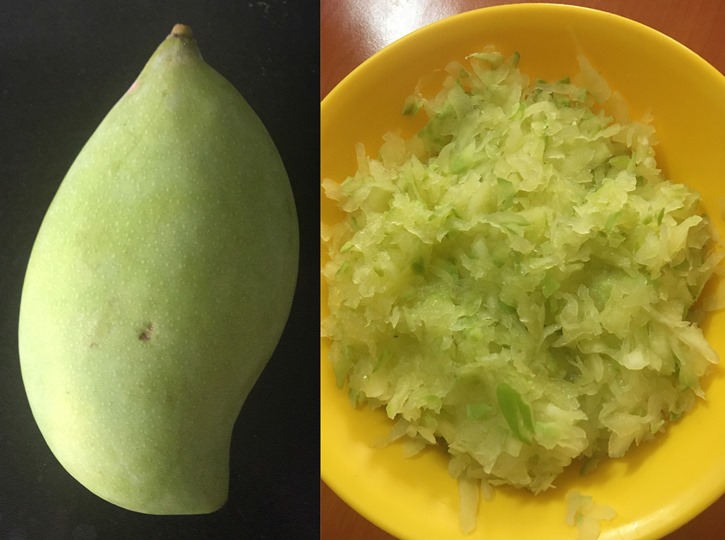
Lets talk about the mango I used to prepare, which is best in preparing this recipe. In India, there are around 283 types of mangoes, out of which only 30 are well-known. The ‘Totapuri’ mango, or Ginimoothi, is a cultivar that is widely grown in south India and is partially cultivated in Sri Lanka. Its tangy taste and chewy texture tastes delicious with tempered seasoning of salt and chilli.
Pickling is the process of preserving or extending the shelf life of food by either anaerobic fermentation in brine or immersion in vinegar. In East Asia, vinaigrette (vegetable oil and vinegar) is also used as a pickling medium. The pickling procedure typically affects the food’s texture, taste and flavour. (Courtesy: Google, Wikipedia)
Don’t forget to check my tips after the recipe. Lets get cooking!!!
INGREDIENTS:
Tangy Raw Mango – 1 medium size (grated – 1 1/2 cup) Vegetable Oil – 3 to 4 tablespoons Poppy seeds – 1/2 teaspoon Salt as per taste
To grind: Dry Red chillies – 7 Mustard seeds – 1/2 teaspoon
PREPARATION:
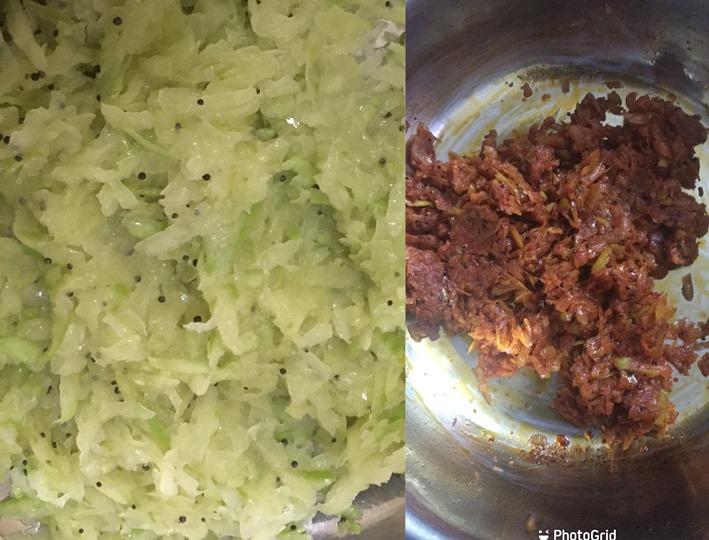
Take a tangy raw mango and wash well. Pat dry the mango and make sure there is no water. Grate the raw mango in a grater with the skin included. I got around 1 1/2 cup of grated mango. Keep this aside.
Meanwhile lets prepare the powder.
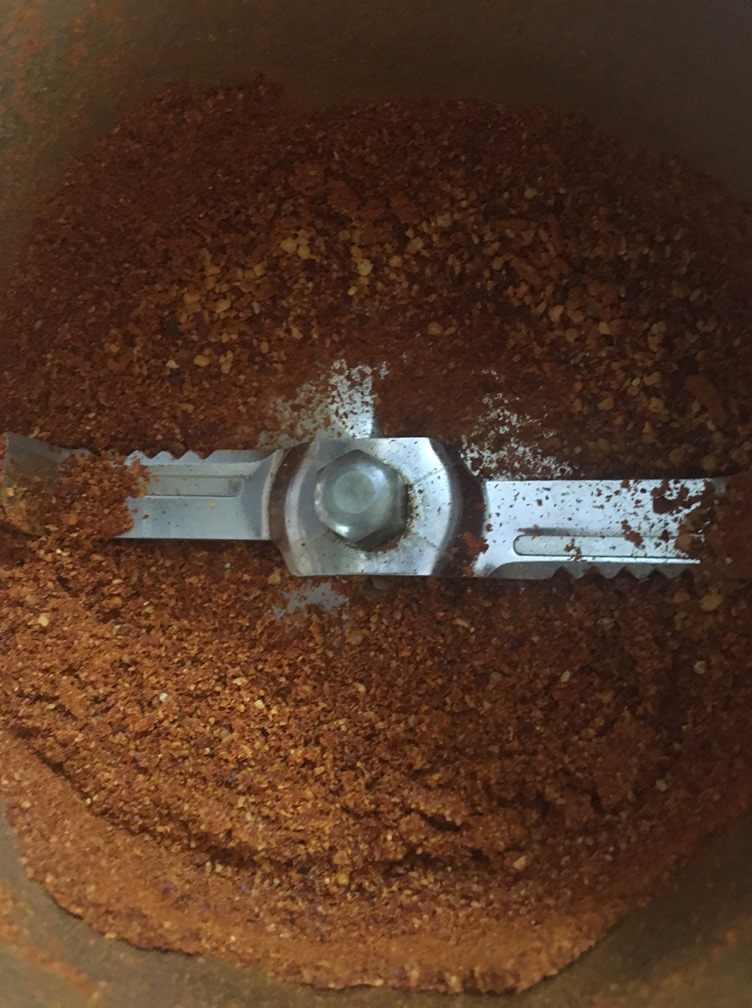
Without oil, dry roast the red chillies and mustard together. Do not burn them. It will take about 1 to 2 minutes. Cool it down. Take it in a mixer grinder and blend it to a fine powder.
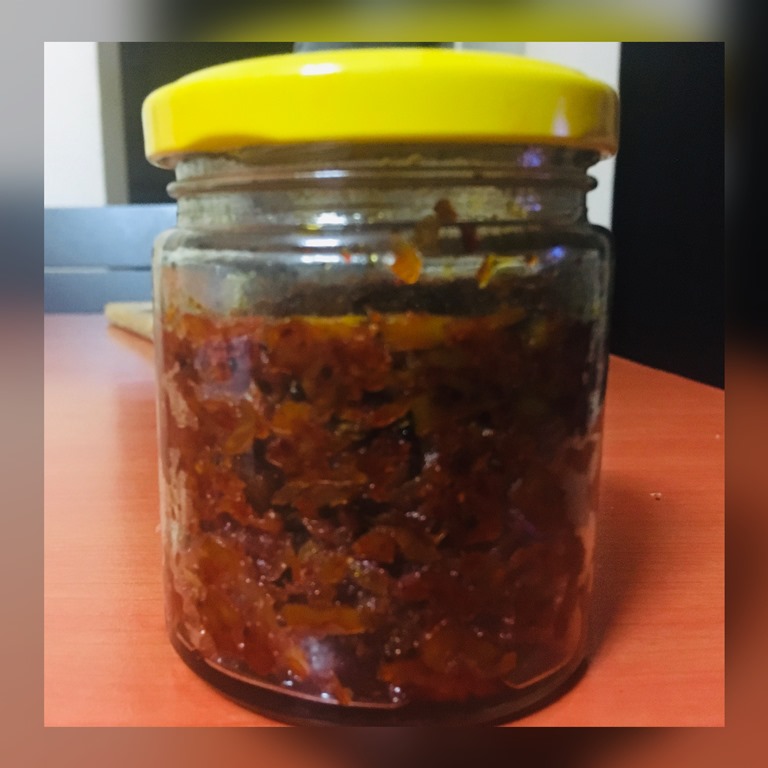
In a pan, take vegetable oil, add mustard seeds and allow it to pop. Now add the grated mangoes. Keep frying them in a slow flame. After the moisture of the mango is gone, add the spice powder one teaspoon at a time (adjust to the spice level). Keep frying for 30 to 40 minutes until mangoes are cooked. Add salt. Keep cooking for another 5 minutes and switch off the flame.
Pickle is ready. Cool the mixture and store it in a air tight glass container inside the fridge.
This can be served as an substitute for chutney or with rice.
TIPS:
– I have used totapuri variety of mango for this recipe, which is best for making this pickle. – it is important that the vessels used in making pickle is dry with no moisture in it. Otherwise the pickle will get spoilt eventually. – the frying time is long, but the longer you fry, the longer the shelf life of the pickle. If doing it in a large quantity or want to store it longer, advise to increase the frying time of the mango pickle to at least 1 to 1.5 hours. – pickles must be stored in a glass container, this is to avoid any reaction caused by the acidity of the pickle. It is also advised that you use only wooden spoon for pickles for the same reason. Never use wet spoon. – spice level of the pickle depends of the spice level of your dried chillies. – it is best to use groundnut oil for this preparation, this enhances favour and smell.
Remember, the key is to taste the dish at every stage and experiment with it. Let me know in the comments below about your experiment with this recipe.
Please do like and share this recipe. Happy Cooking!!!
Pasta is an Italian type of food typically made from an unleavened dough of wheat flour mixed with water, and formed into sheets or other shapes, then cooked by boiling or baking. Pasta is a staple food of Italian cuisine.
Pastas are divided into two broad categories: dried and fresh. Both dried and fresh pastas come in a number of shapes and varieties, with 310 specific forms known by over 1300 documented names. In Italy, the names of specific pasta shapes or types often vary by locale.
In terms of nutrition, cooked plain pasta is 31% carbohydrates (mostly starch), 6% protein, and low in fat, with moderate amounts of manganese, but pasta generally has low micronutrient content. (Courtesy: Wikipedia)
Don’t forget to check my tips after the recipe. Lets get cooking!!!
Cup measurement: 200 ml cup or 13.5 tablespoons
INGREDIENTS:
For the Pasta: Wheat pasta – 2 cups (Penne used) Oil – 1 teaspoon Water and Salt to cook pasta
For the Sauce: Butter – 2 tablespoons All purpose flour or refined flour – 2 tablespoons Milk – 1 1/2 cups Water – 1 cup or required consistency Salt as per taste
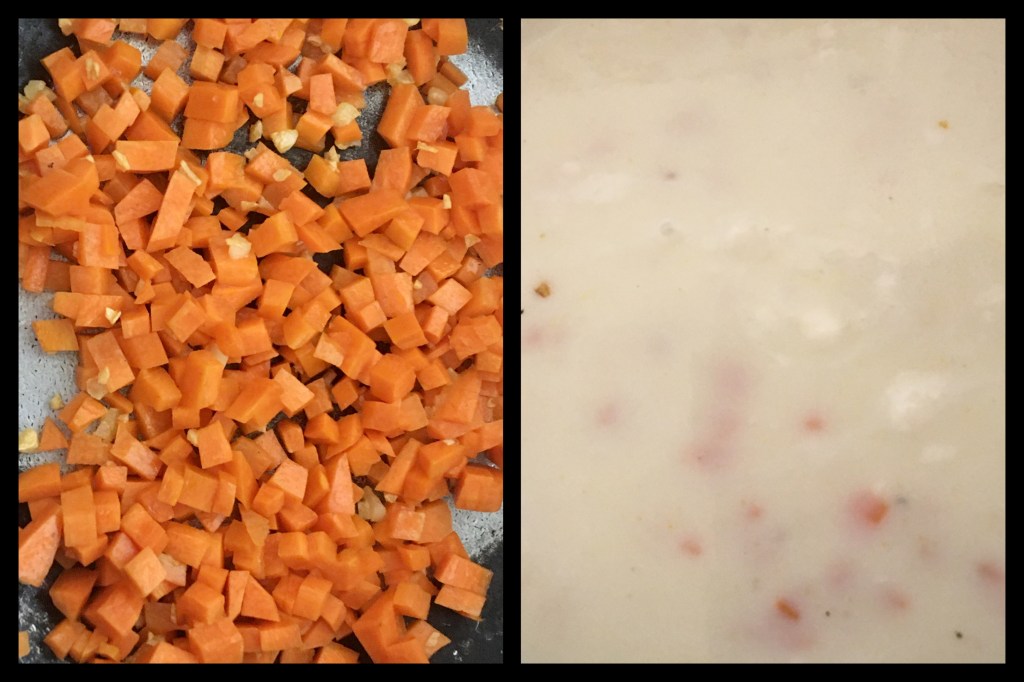
Finally chopped garlic and carrots or any vegetable of your choice (Sauté it separately before adding)
PREPARATION:
Cooking the Pasta:
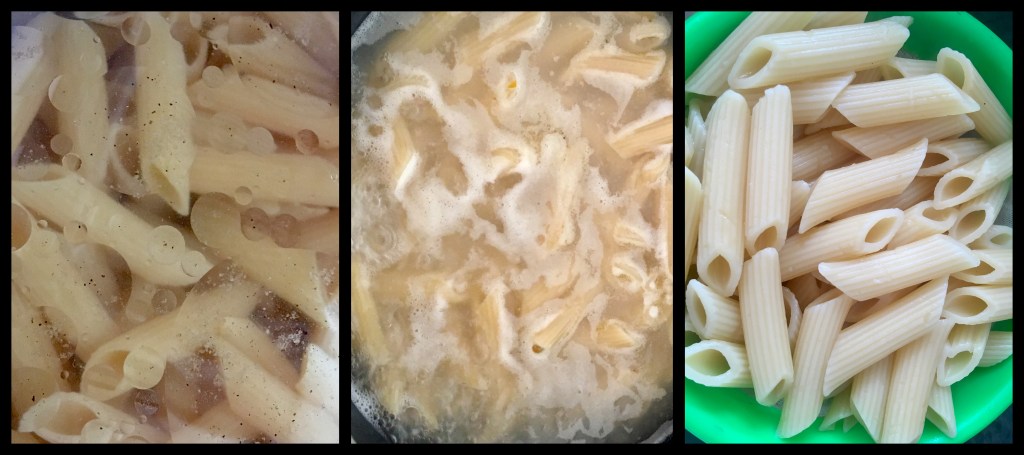
In a pot, take 3 parts of water and bring it to boil. Add salt and oil. Now add wheat pasta and bring it to boil. Make sure that the pasta is stirred in regular intervals, so that it doesn’t settle at the bottom. When pasta is cooked, it will increase double the size. It will take about 10 to 15 minutes in medium flame.
Once cooked completely, take it out and drain the water. Keep it aside.
Preparing the white sauce:
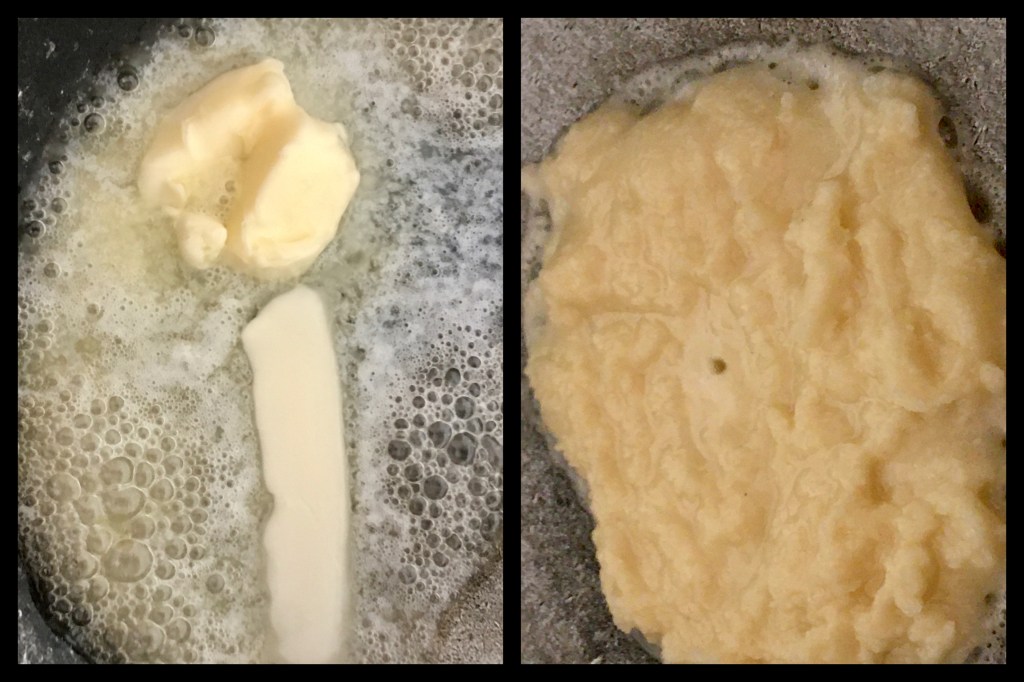
In a pan, add butter and melt it. Now add all purpose flour and give it a good mix. It will turn into a lump in one or two minutes.
Now add milk and dissolve without any lumps. Keep stirring. Add water as desired. Add salt and sautéed vegetables. Bring the mixture to a boil.
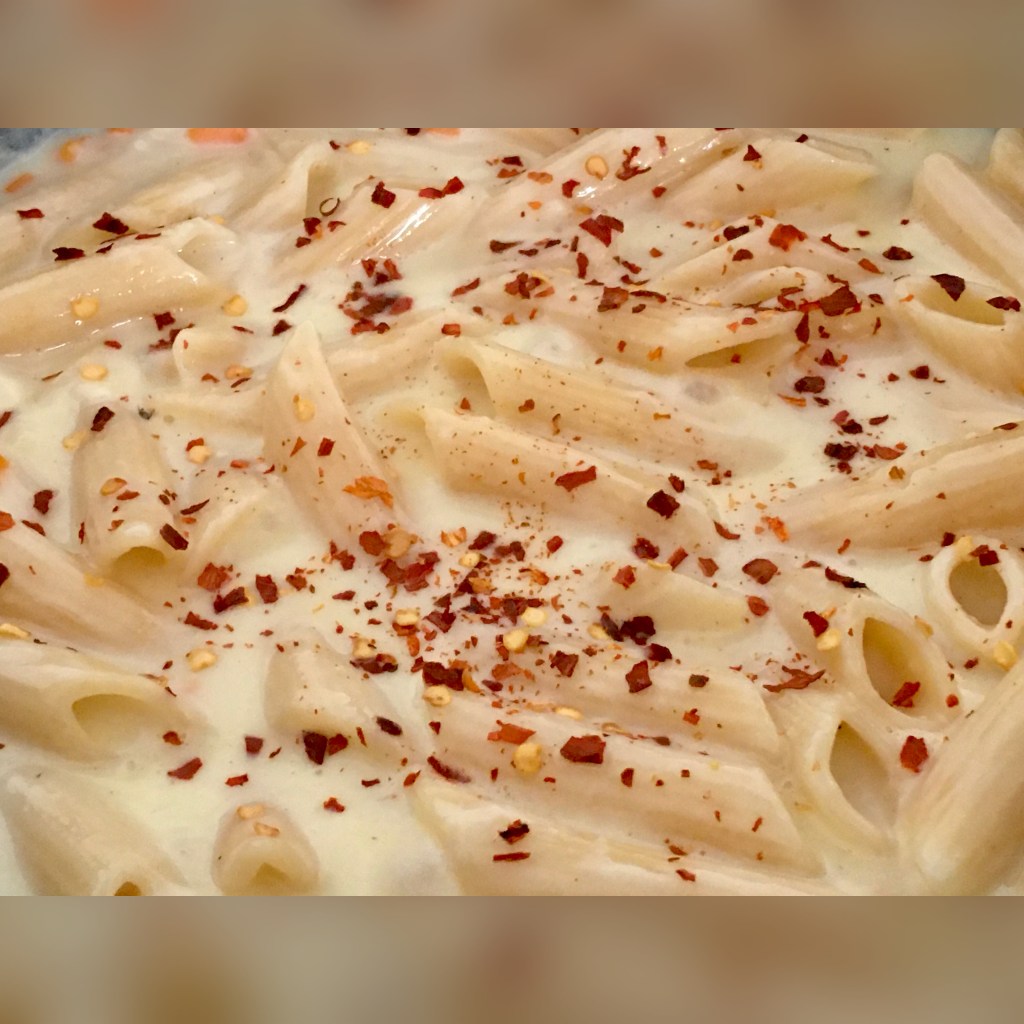
Add the cooked wheat pasta and give it a good mix, the gravy will thicken once it cools. Take it out from the flame.
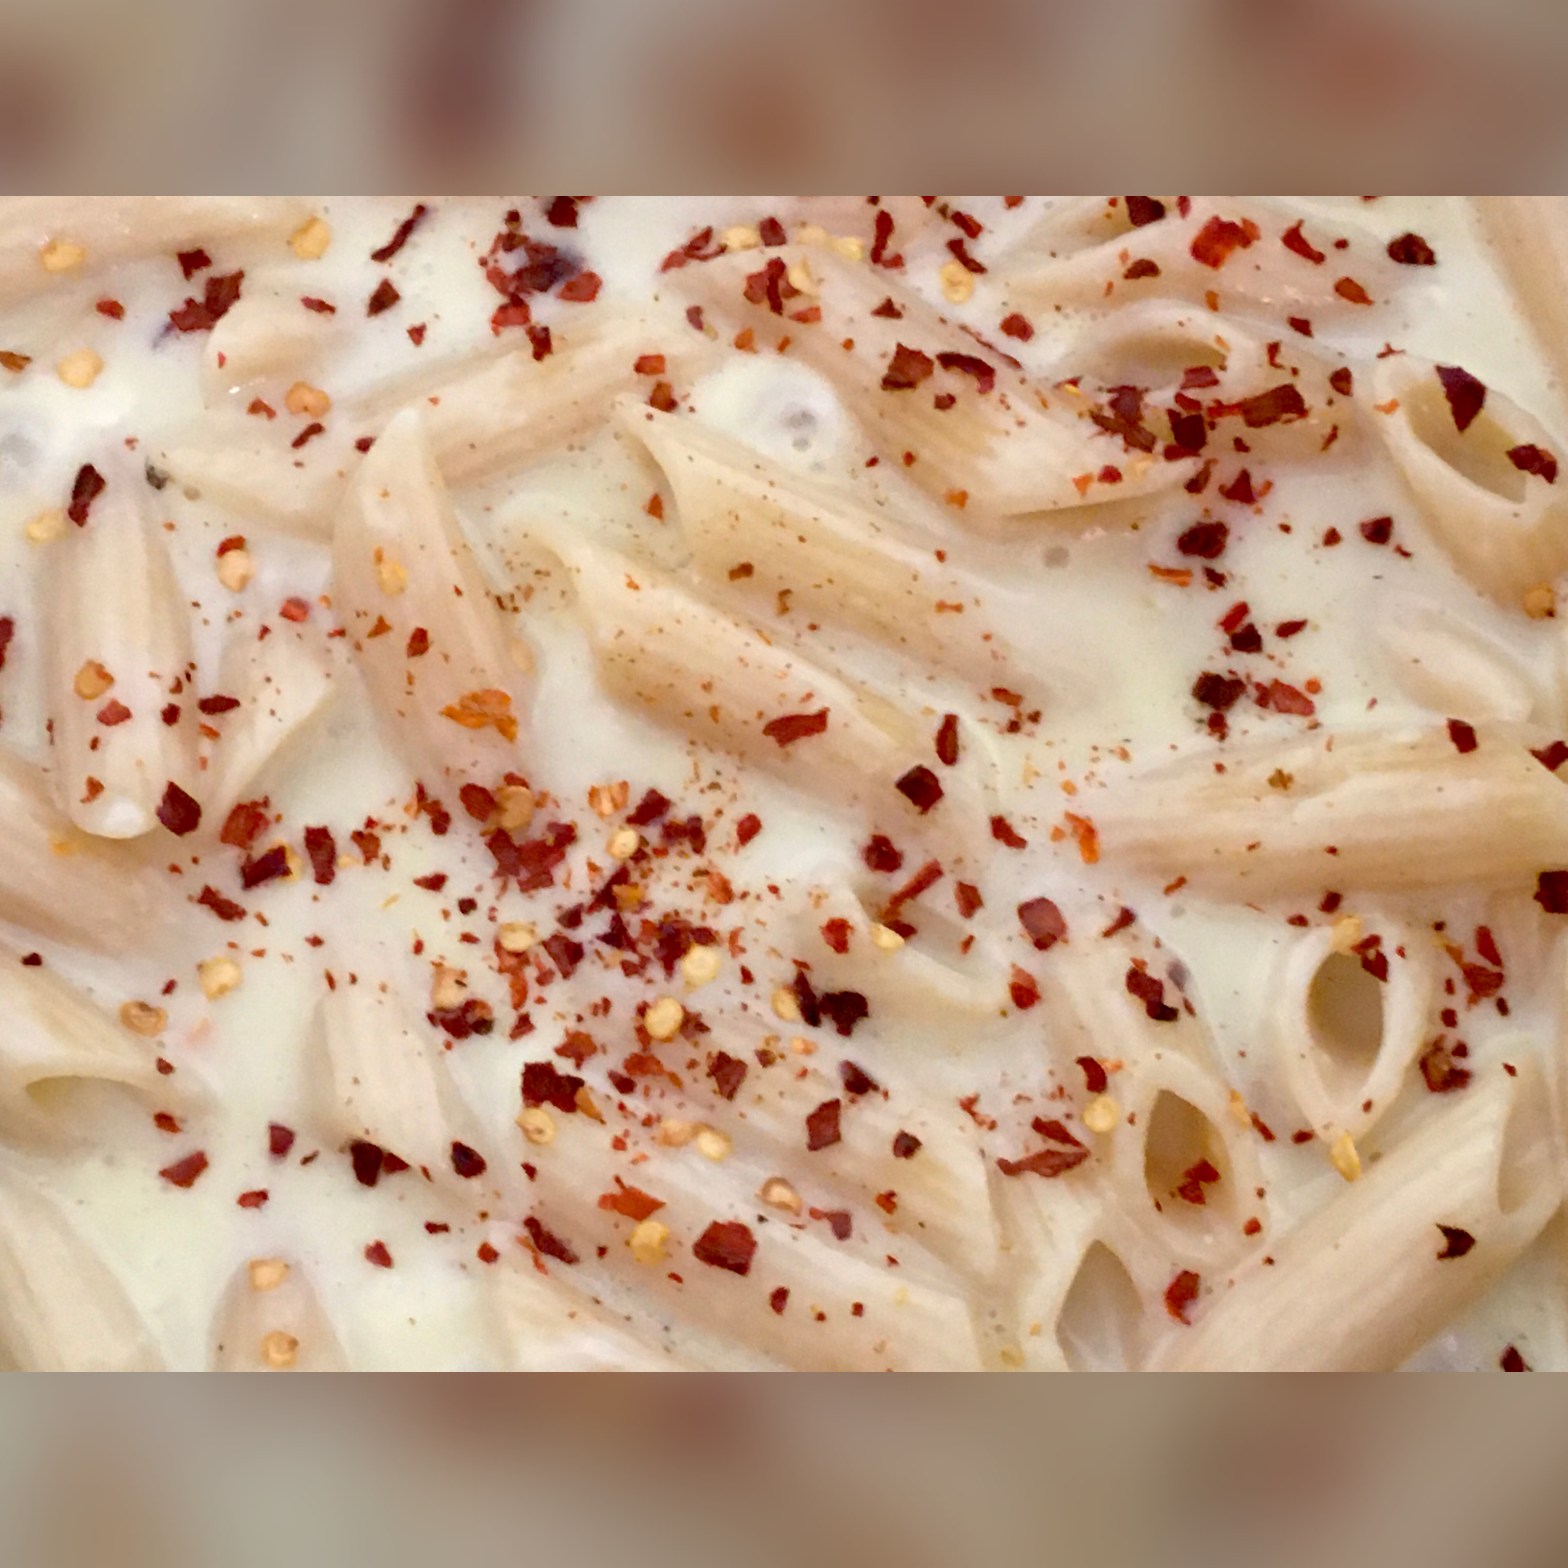
Add chilli flakes, pepper or any other toppings of your choice.
Serve it hot, Pasta tastes good while its still hot.
TIPS:
– oil is added to the pasta while cooking, so that it doesn’t stick together, – test the pasta is cooked completely by piercing it through a fork. – the consistency of the gravy could be adjusted with the amount of water you add to it. Please beware that the gravy will thicken once cooled. – vegetable are to be sautéed separately before making the pasta. – the toppings added is of your choice and taste.
Remember, the key is to taste the dish at every stage and experiment with it. Let me know in the comments below about your experiment with this recipe.
Please do like and share this recipe. Happy Cooking!!!
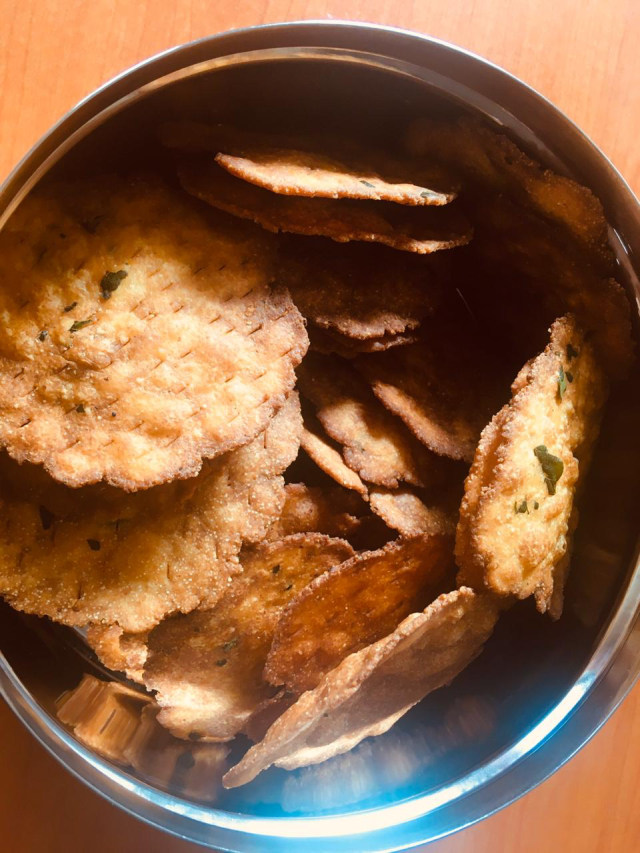
This is my aunt’s recipe passed on by my mom to me. This snack is one of my favourite childhood memory, listening to my aunt’s stories and having my favourite snack by the side. She used to make box full of these crisps and send it along when I go back home from her place.
To my surprise, when I prepare her recipe, it never tastes as good as hers. It is her memories with the crisps that I cherish till date. Even now, when I visit her, she prepares the same way I remember.
This is a pretty simple recipe which the kids and adults equally will love to munch them. You can never stop having just one. The best part of this recipe is how crispy it will be once prepared will less efforts and time.
Don’t forget to check my tips after the recipe. Lets get cooking!!!
Yield: More or less 35 crisps Cup measurement: 200 ml cup or 13.5 tablespoons
Ingredients:
Curd – 1 cup Sooji or rava or semolina – 3 1/2 cups Red chilli powder – 1 tablespoon Asafoetida or hing – 1/2 teaspoon Curry leaves – 15 leaves (roughly chopped) Vegetable oil – 1 tablespoon + Oil for frying in a pan Salt – 1 teaspoon (or as per taste)
Preparation:
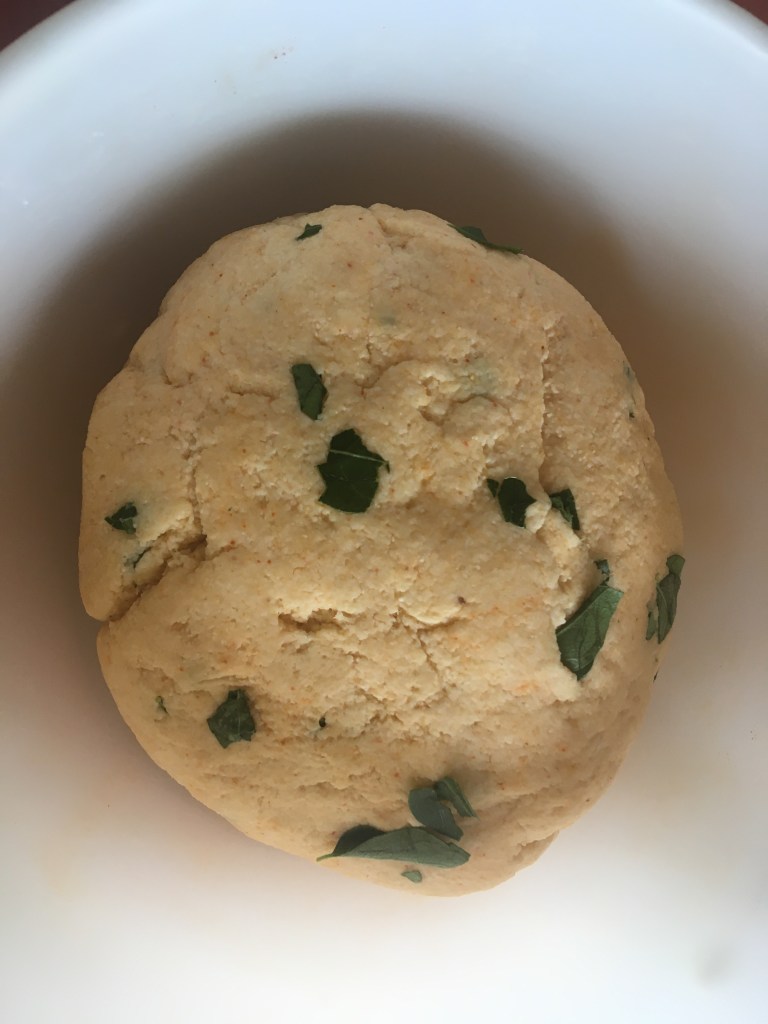
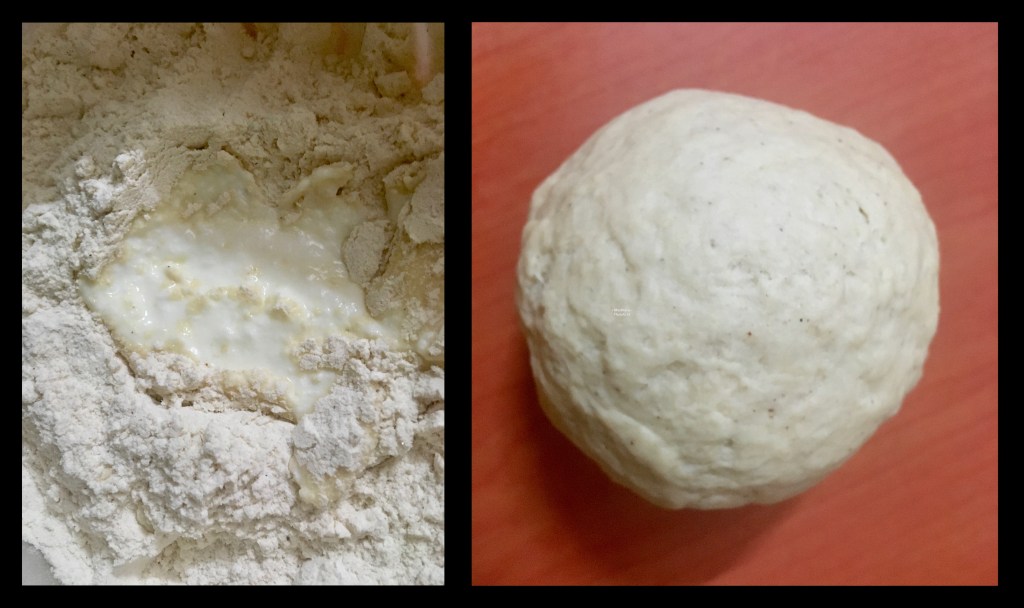
Take a bowl; add curd, red chilli powder, asafoetida and salt. Mix and blend well. Add the chopped curry leaves and oil and give it a good mix.
Take two cups of sooji and add to this liquid mixture. Keep kneading the dough. Add one more cup and keep kneading. Finally add half cup sooji (little by little) and mix well. The dough should be very tight. Add additional sooji till you could add no more. No need to rest the dough. Keep the dough covered with wet towel and do not allow it to dry from the side. (see tips)
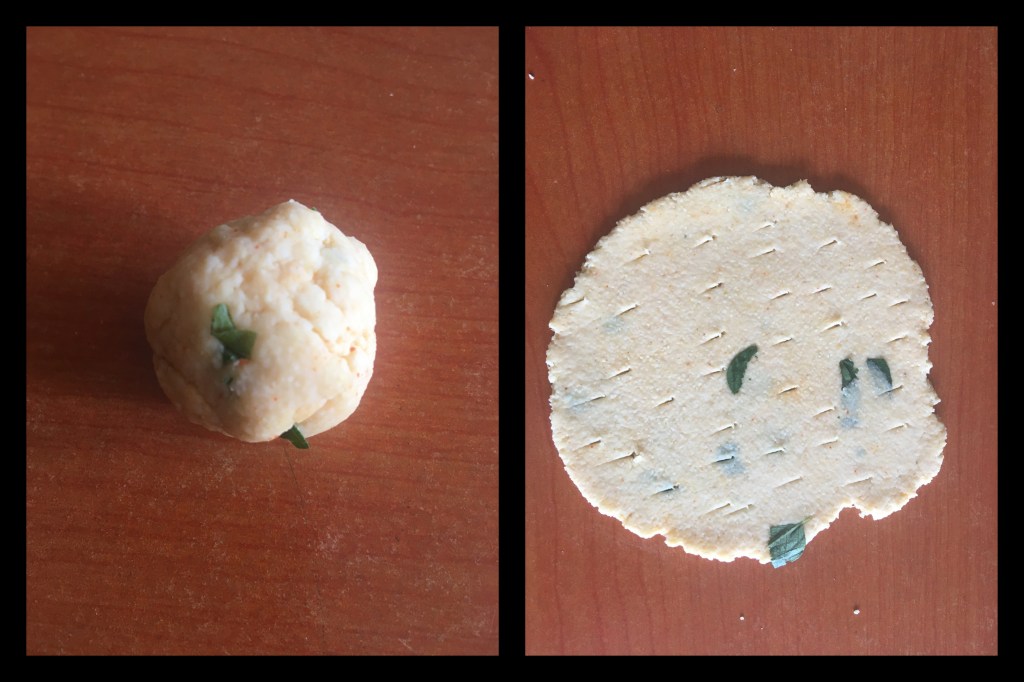
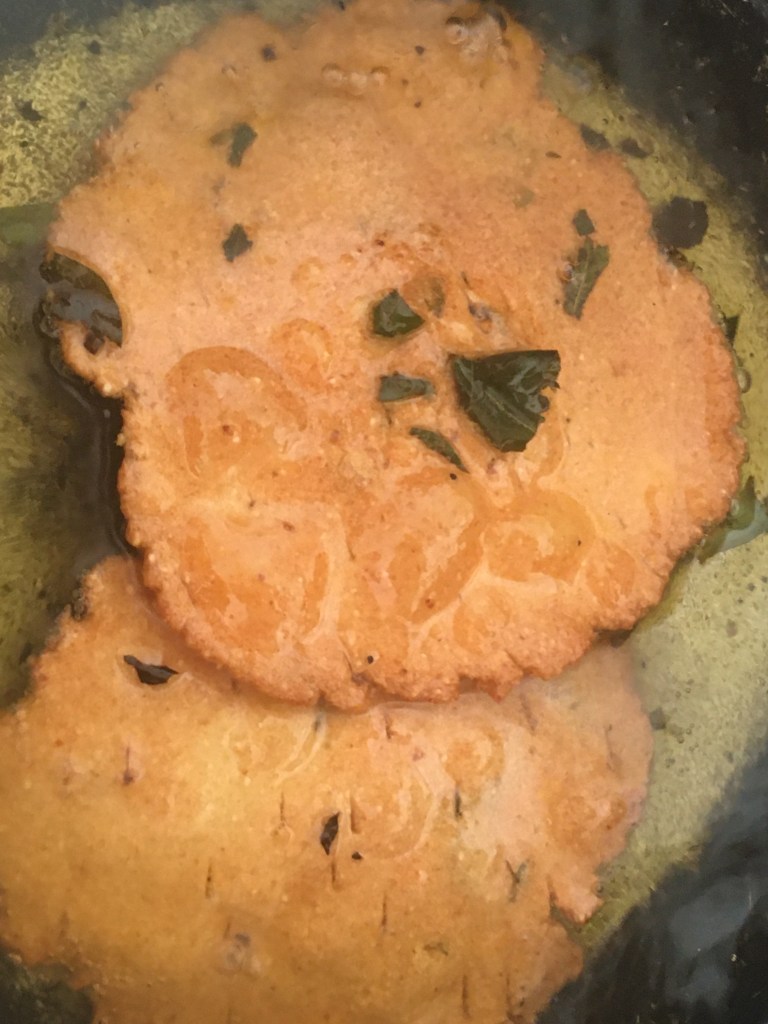
Take small portion of dough (about 1 tablespoon). Roll it thin like a size of poori. Take a fork or knife and prick the flattened dough (check the picture). This will avoid the dough from puffing up.
Once the oil is hot to fry, at a medium to low flame, fry one or two flattened dough at a time. Fry flipping it in both sides until it turns brown. Keep an eye and do not burn them. Once fried, collect them in a tissue paper.
Best served with tea or coffee or munch it anytime you feel like eating a snack. Always store them in an air tight container.
TIPS:
– the amount of sooji required depends on the quality of the sooji, so it is important to add little by little to the liquid mixture. Generally sooji will absorb more liquid, so need to work fast while kneading. – the tight dough will absorb less oil while frying. – additionally you can use jeera or carom seeds in the dough if preferred. – before frying, drop a piece of dough to check whether the oil is hot. If it comes up slowing fry, its correct heat temperature. Do not make the oil too hot.
Remember, the key is to taste the dish at every stage and experiment with it. Let me know in the comments below about your experiment with this recipe.
Please do like and share this recipe. Happy Frying!!!
Going out to eat pizza on Friday evenings is no more a must for me! Now I know how to prepare perfect pizza on my own. I am pretty pleased as to how this recipe turned out. It has a soft crust and have the taste better than what you get in pizza outlets. Since it is homemade, you can top it with love and warmth for your loved ones.
Like many of us, I used to wonder if I could ever replace the yeast in bread making. I am surprised there are so many chefs who tried and mastered the art. I went through so many different recipes and formulated my own. Here is my own pizza recipe that I would love to share with all of you.
I have divided my recipe into multiple parts; the crust, pizza sauce and assembling them all. Additionally, I made my own chilli fakes. It is very easy and simple to follow.
Don’t forget to check my tips after the recipe. Lets get cooking!!!
Cup measurement: 200 ml cup or 13.5 tablespoons
Yield: One medium thin crust pizza – around 9.5 inches
Ingredients:
Crust base: Whole wheat flour- 3/4 cup All purpose flour – 3/4 cup Powdered sugar – 1 teaspoon Salt – 1/4 teaspoon Baking soda – 1/2 teaspoon Baking powder – 1/2 teaspoon Curd – 1/2 cup Vegetable Oil – 1 1/2 tablespoons
For stuffing: cheese or any thick gravy stuffing of your choice
Pizza Red Sauce: Cooking oil – 1 tablespoon Tomatoes – 2 medium size Onion – 1 small size Green chilli – 1 or 2 Garlic – 4 cloves Coriander leaves or basil leaves or oregano- small quantity Salt as per taste Little water for grinding
For toppings: vegetables of your choice
Preparation:
Making the dough base:
Take whole wheat flour in a bowl and all purpose flour and mix them all well. To this mixture, add sugar, salt, baking soda, baking powder and mix well.
Take curd and add small portions of it to this mixture and keep mixing till you make a soft dough. It may be sticky in the beginning. Please note that, it is not necessary to use the entire mentioned proportion in the recipe.
Once the dough is ready, add oil and start kneading. If its too sticky, add more oil. You have to knead for at least 6 to 7 minutes continuously until the dough becomes soft and airy. Keep aside for resting for about 15 minutes.
Meanwhile, lets prepare the sauce.
Sauce preparation:
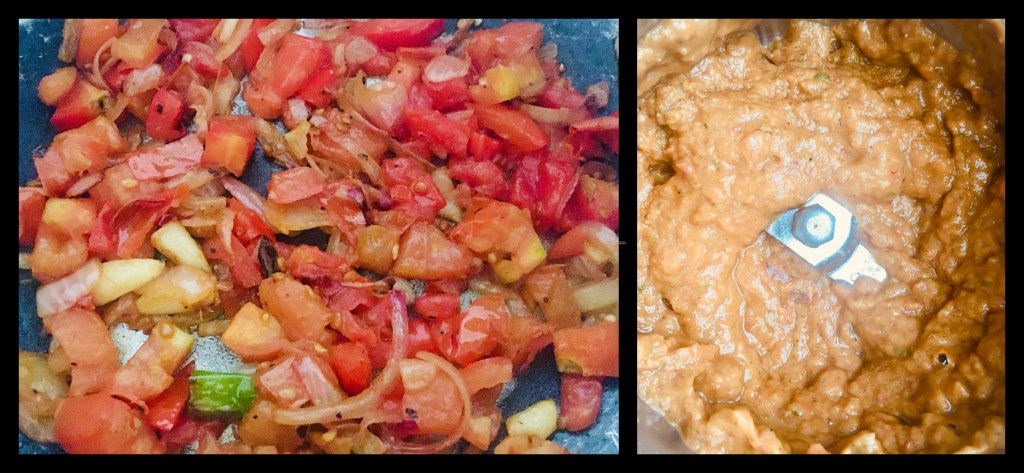
In a pan, take one tablespoon of oil, fry the garlic and green chillies for couple of seconds. Add onions, fry them until they turn transparent. Add tomatoes, fry them until they become soft. Turn the gas off and cool the mixture.
Transfer it in a mixer grinder with coriander leaves or mint leaves or basil leaves, and blend it into a smooth paste. I added only one tablespoon of water to it. The paste should be of thick consistency. Take in a cup and keep it aside.
Meanwhile chop the vegetables toppings you like to add. I used capsicum, onion, sweet corn, paneer or cottage cheese and chilli flakes. Keep it ready. (You will find the chilli flakes recipe at the end.)
Baking the dough base:
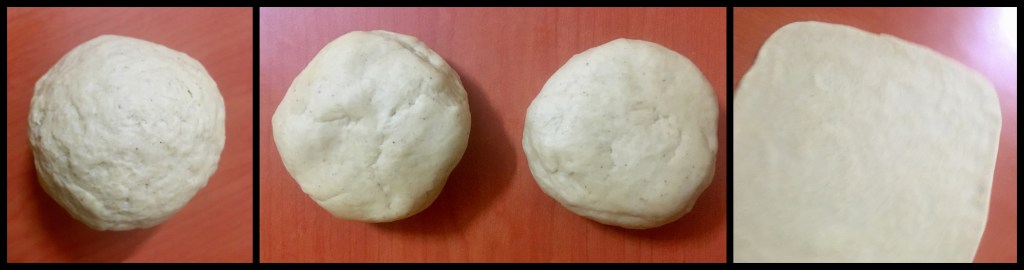
Take the dough and knead it for 1 or 2 mins. Roll it into a cylinder and divide it into 2 equal parts. Take one portion and roll it into desired shape. I made square shaped. Transfer it to a tray with baking sheet or grease the tray with oil or butter.
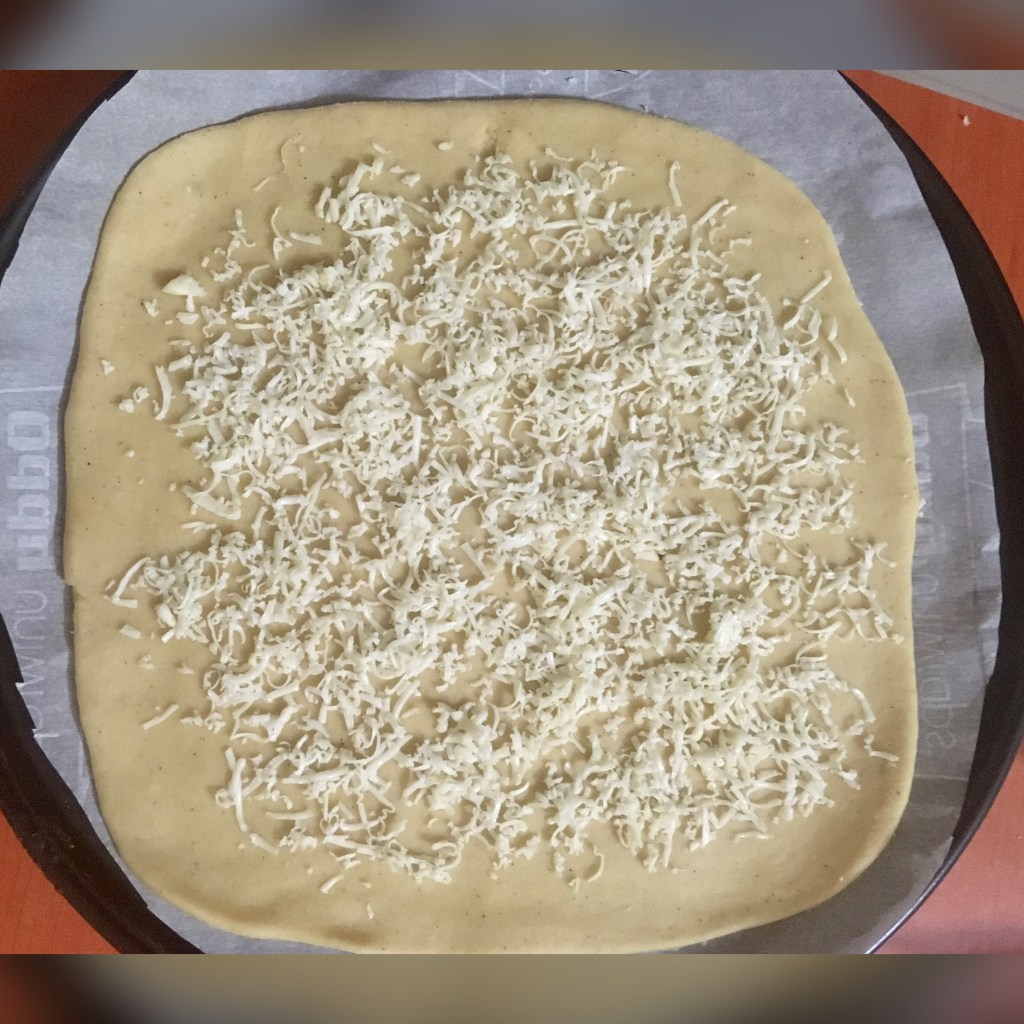
I have grated cheese available at my house (but the quantity was less). Do not spread the filling to the side, leave a gap on the side.
Take the other portion of dough and again roll it to the desired shape.
Brush the sides of the base containing the filling with very little water. Place the second layer and pinch it lightly from all corners shut. Make sure there are no leakage.
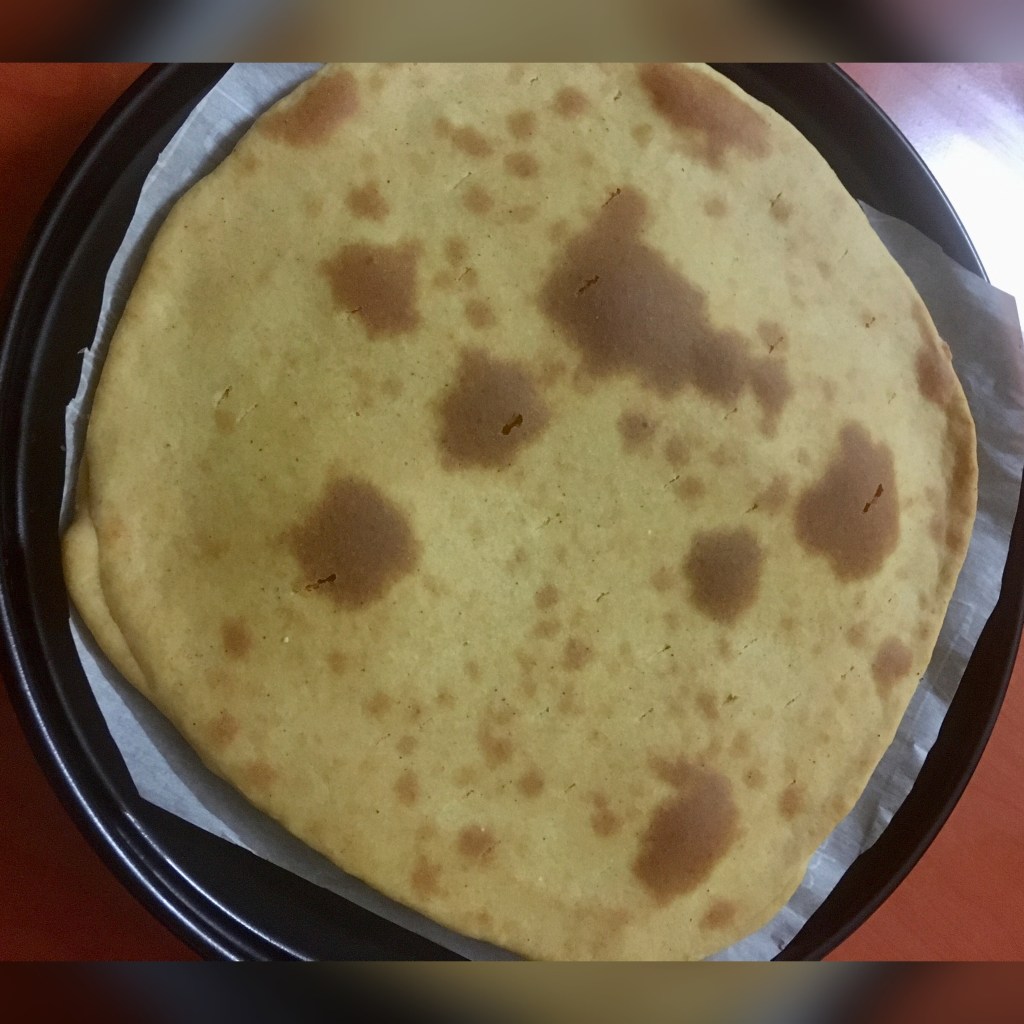
Meanwhile pre-heat the oven at 180 degrees.
Place the crust and bake for 5 mins at 180 degrees. This is to make sure that the base cooks completely.
After baking take it out and allow it to cool down.
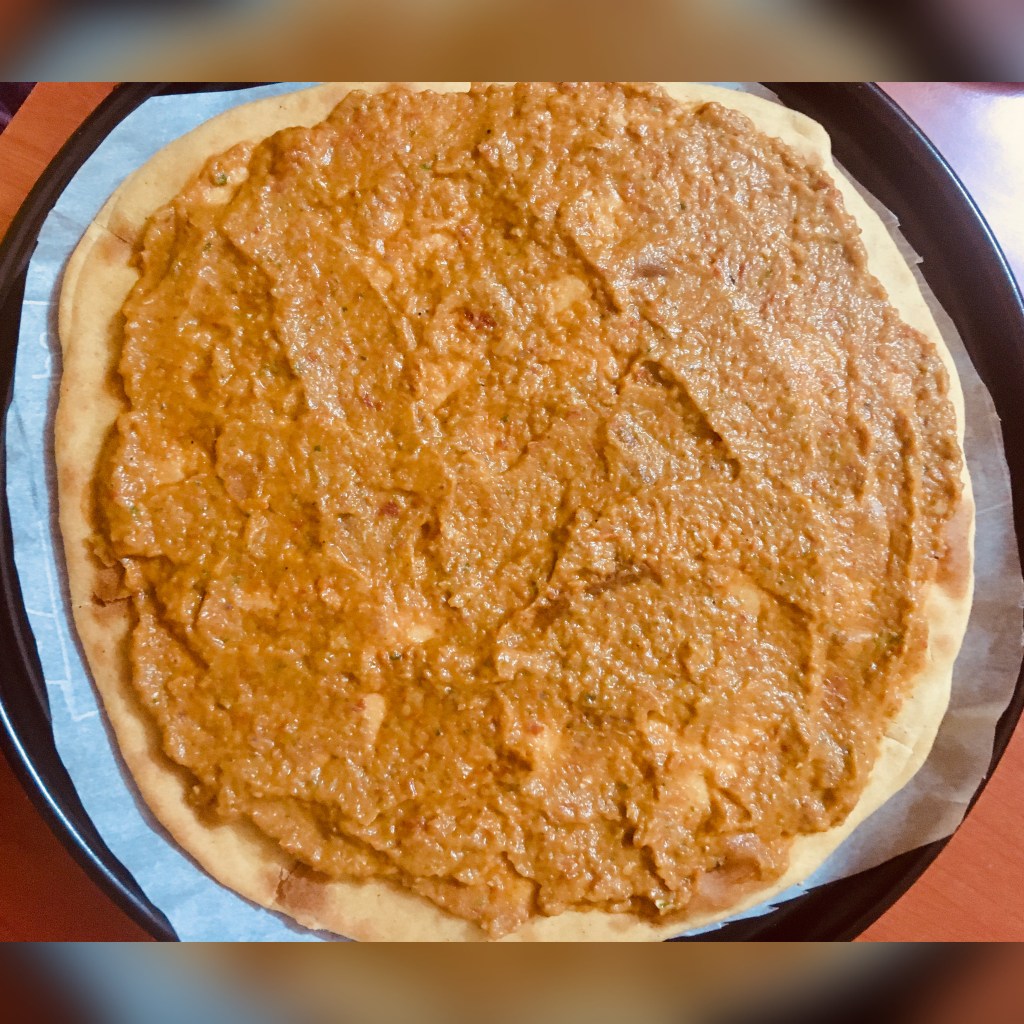
Final assembling:
Take the sauce and spread evenly on the baked base. Do not spread on the extreme corners of the base.
Add the vegetables and other desired toppings.
Before placing the final pizza into the oven, make sure that the oven is once again pre-heated to 180 degrees. Place the tray and bake for 5 minutes at 180 degrees or until the toppings are cooked.
I have made thin crust pizza, medium size. Let it cool and serve with tomato ketchup or more chilli flakes or oregano.
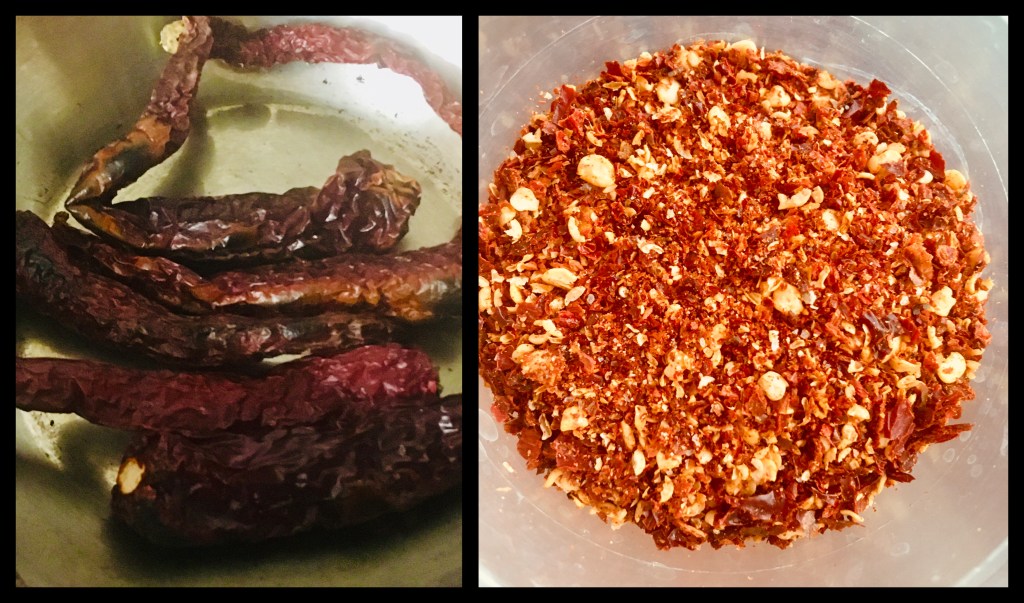
Additional recipe for chilli flakes:
Take 4 to 5 dry red chillies in a pan. Fry it dry for 2 to 3 minutes until it turns crispy. Please be careful not to burn them. Turn off the gas, cool them and transfer it to a mixer grinder. Pulse the chillies for couple of seconds. Add pinch of salt and chilli flakes are ready.
TIPS:
– You can try this recipe with full whole wheat flour or full all purpose flour, same measurement to take. But please keep in mind that whole wheat consumes more liquid than all purpose flour. So it is important to add liquid little by little. – you can replace baking soda and baking powder with any one of them available with same measurement (i.e., only with 1 teaspoon of baking soda or baking powder, instead of half and half). – alternatively, you can completely replace baking soda and baking powder with 1 teaspoon eno or fruit salt powder. – If there are no curd, take little less than half cup of milk and add 1/4 teaspoon of lemon juice or vinegar and mix well. Wait for the milk to curdle for 5 minutes and then add it to the dough mix. – You can add chilli flakes or oregano while making the dough base for some extra flavour. If you want to add oregano, remember not to add bake them. Add it at the end. – You can make the same recipe without any stuffing or even thick crust, just roll out thick. – Tomato sauce ingredients could be adjusted to ones taste. This is a basic recipe and you can add your own variations to it.
Remember, the key is to taste the dish at every stage and experiment with it. Let me know in the comments below about your experiment with this recipe.
Please do like and share this recipe. Happy Baking!!!
PappaRoti or coffee bun is a Malaysian chain which serves buns with hot and cold beverages. The name originates from the word “roti” meaning bread in Malaysia, making the owner of PappaRoti the father of buns. (Courtesy: Google.)
Let me start by giving credits of the person I got the recipe from Deepa Jha (https://www.facebook.com/groups/deesbakecraft). She conducted an online class to teach this recipe. I have experimented with the original recipe and created my own version out of it. It tasted perfect. Thank you for this recipe.
This bun recipe is one proof, sweet bread recipe. I have split the recipe into two parts. First part, the bread bun recipe. Second part, the coffee topping.
Don’t forget to check my tips after the recipe. Lets get cooking!!!
Cup measurement for this recipe: 240ml or roughly 135 grams or 16 tablespoons
Bread Ingredients:
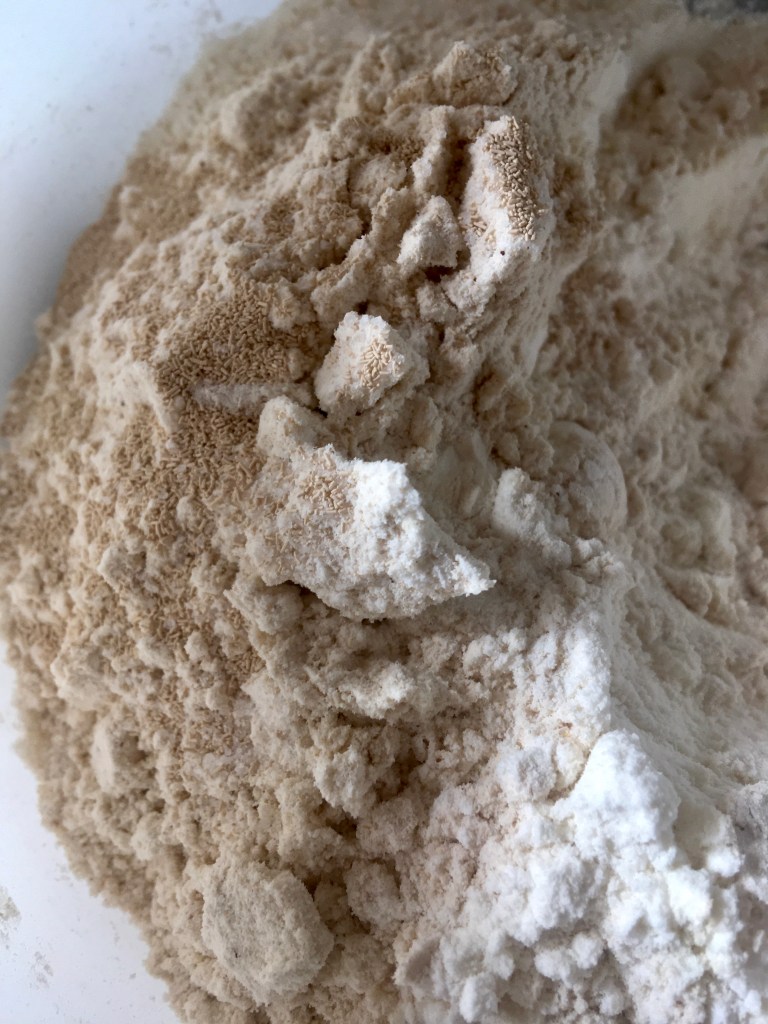
All purpose flour – 1/2 cup Wheat flour – 1/2 cup Powdered Sugar – 2 tablespoons Instant Dry Yeast – 1/2 teaspoon Milk – 1/4 cup Water – 1/4 cup (may require more for kneading bread) Vegetable oil – 1 tablespoon Salt – 1/4 teaspoon Cold butter – small portions (optional)
Take a bowl; add all purpose flour, wheat flour, powdered sugar, instant dry yeast, salt. Mix them all well.
You need to add water and milk, adding 2 tablespoons each, at a time. The dough has to be soft, then the buns will turn out soft as well, add more of water or milk if required. Once the ingredients combine well, add oil and knead more. The dough might be sticky. You need to knead the dough for at least 7 to 8 minutes continuously in a flat surface or bowl (whichever is convenient). If the dough is more sticky, add more of oil (Do not add more of flour).
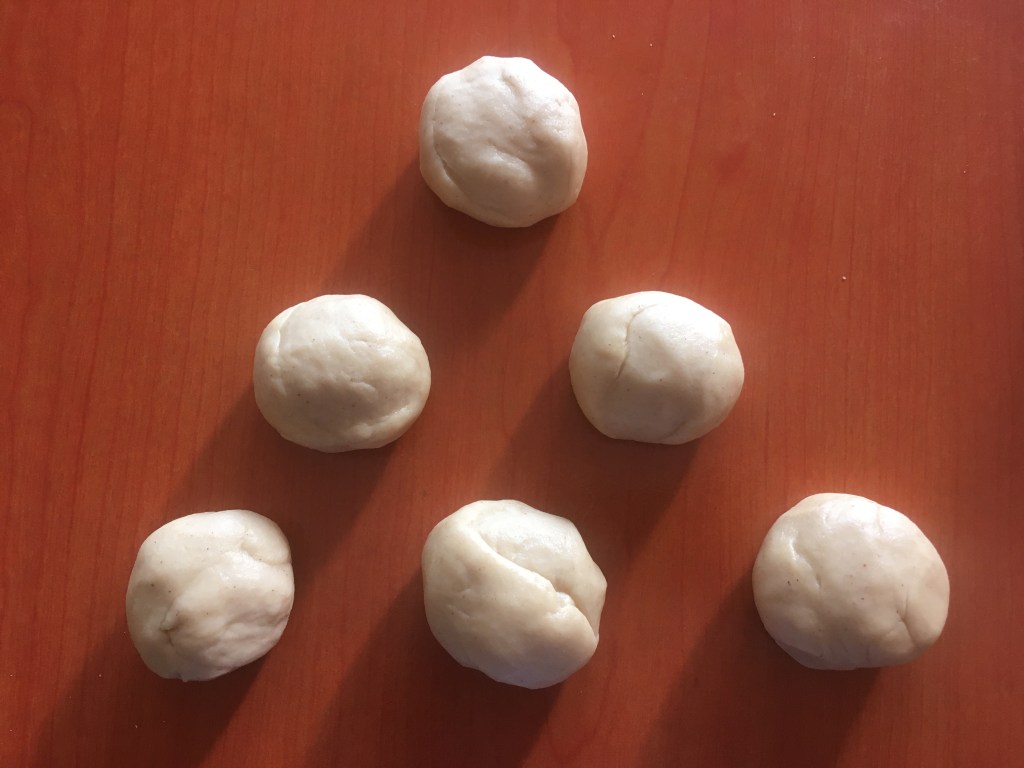
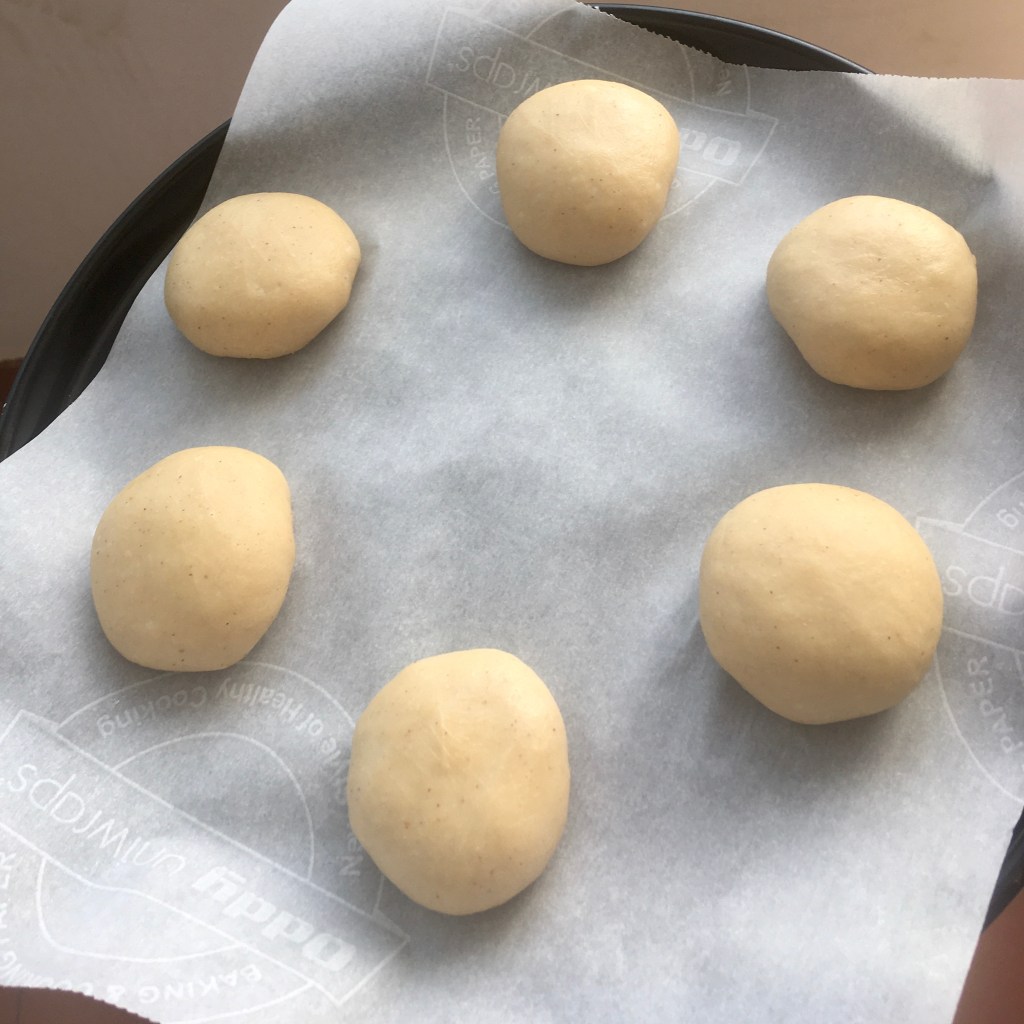
Roll the dough into a long cylinder and divide the dough into equal part. I have made into 6 equal parts.
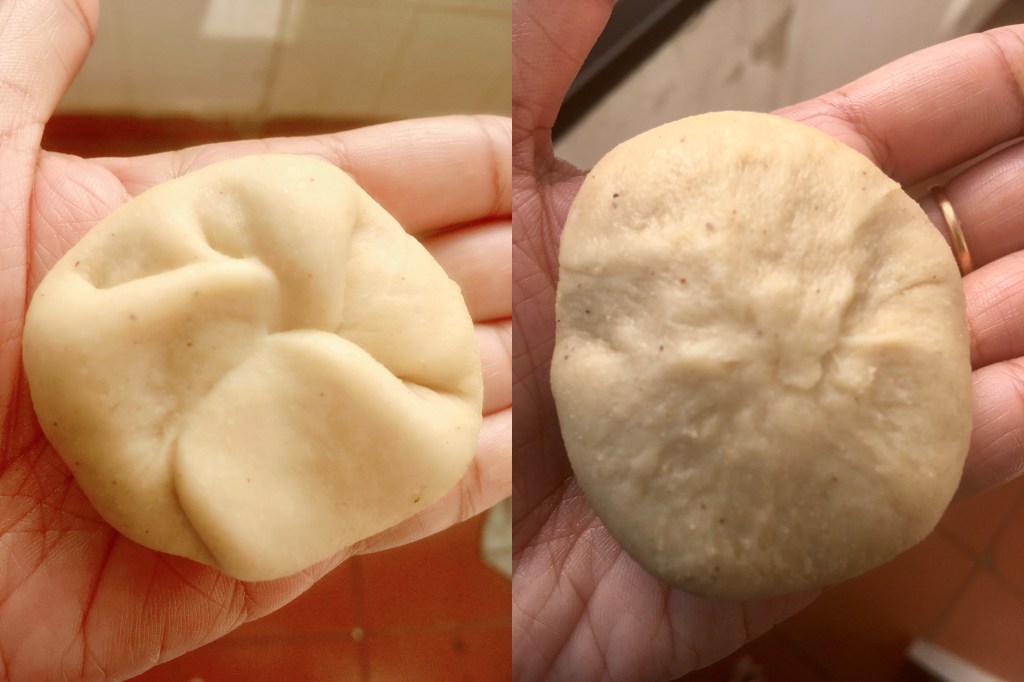
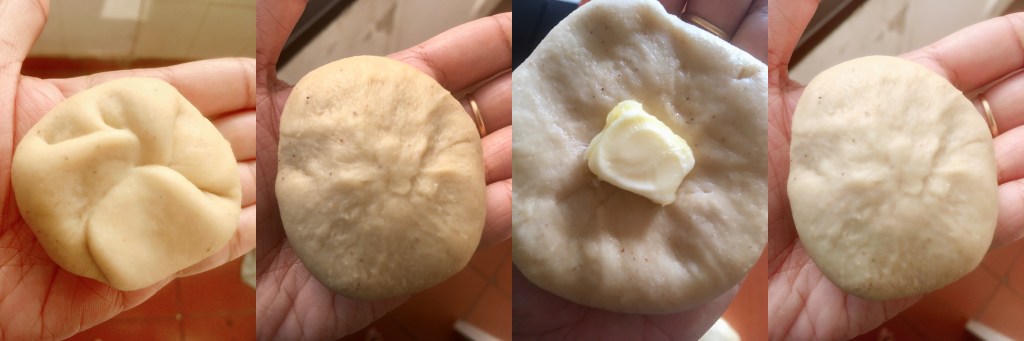
Take one portion, flatten it with your fingers on your palm, fold the edges inwards. Pinch the cracks. This step is important to get the smooth edge on the top of the buns and the cracked part will go under.
Additionally repeat the process of flattening the bun, take a piece of cold butter and place it in centre. now carefully stretch and fold all the edges and pinch the same way. This will create a butter pocket once baked. This step is optional.
Take a baking tray and place the butter paper. Prepare the buns and place them one by one on the tray with or without the filling. Allow it to proof for 45 minutes or until it raises double the size.
Meanwhile lets prepare the coffee filling.
Coffee topping preparation:
Take water in a bowl and mix the coffee powder, dissolve well. Add coco powder, dissolve well.
Add powdered sugar, mix well, make sure there are no lumps.
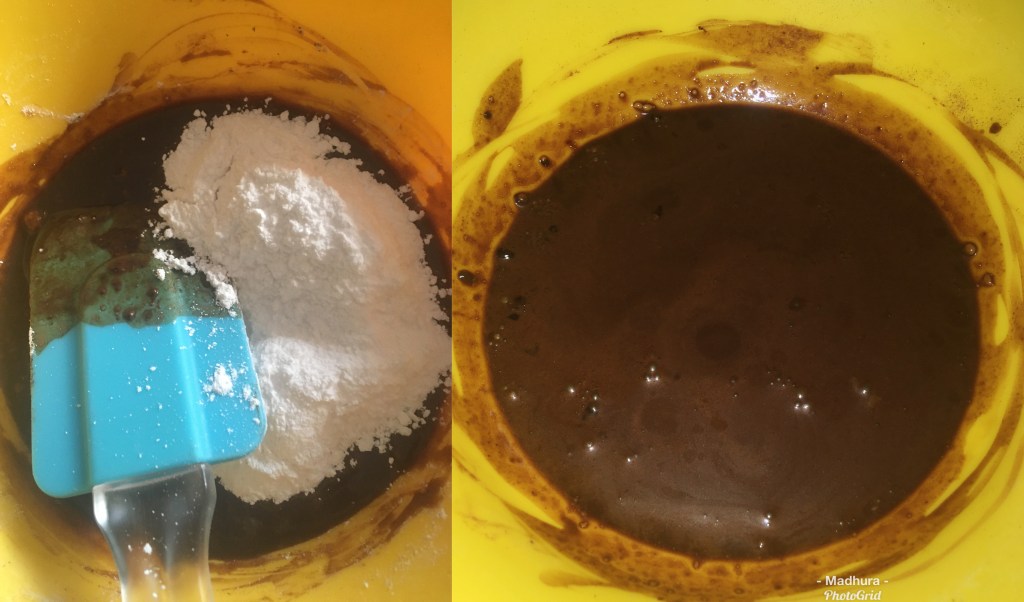
Add half of the all purpose flour as given in the recipe. Mix well. Add the other half. Add additional water if required (1 teaspoon at a time).
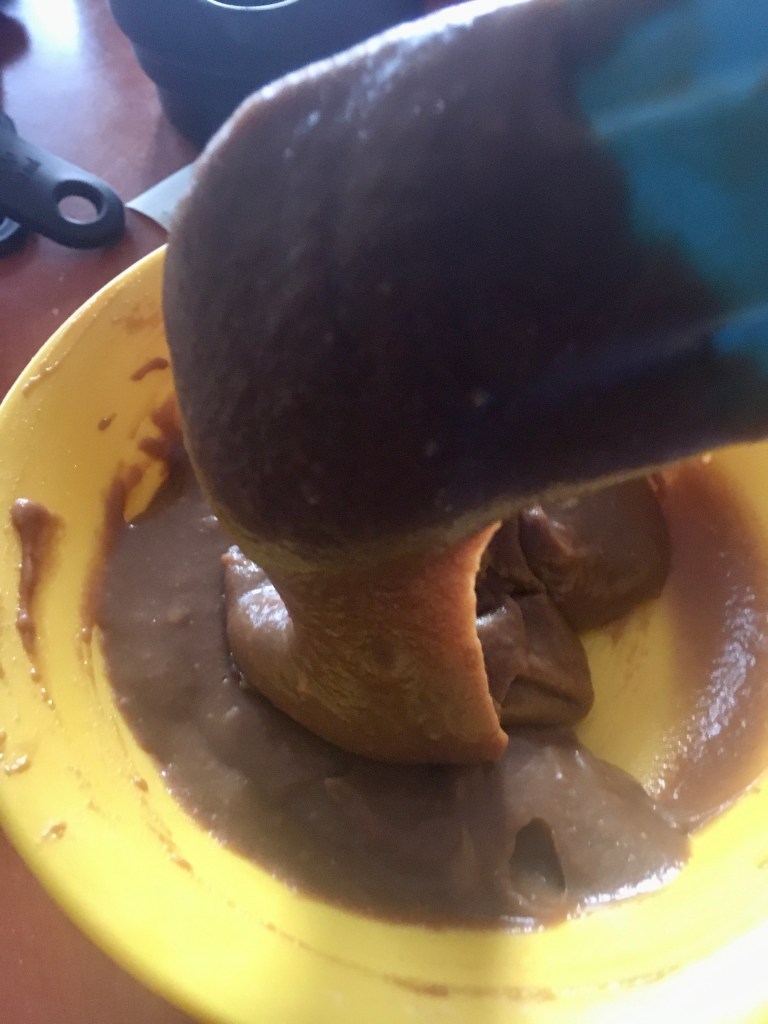
The consistency of the batter should be thick and not too watery, so do not add too much water. I would say, it should be dropping consistency as shown in the picture.
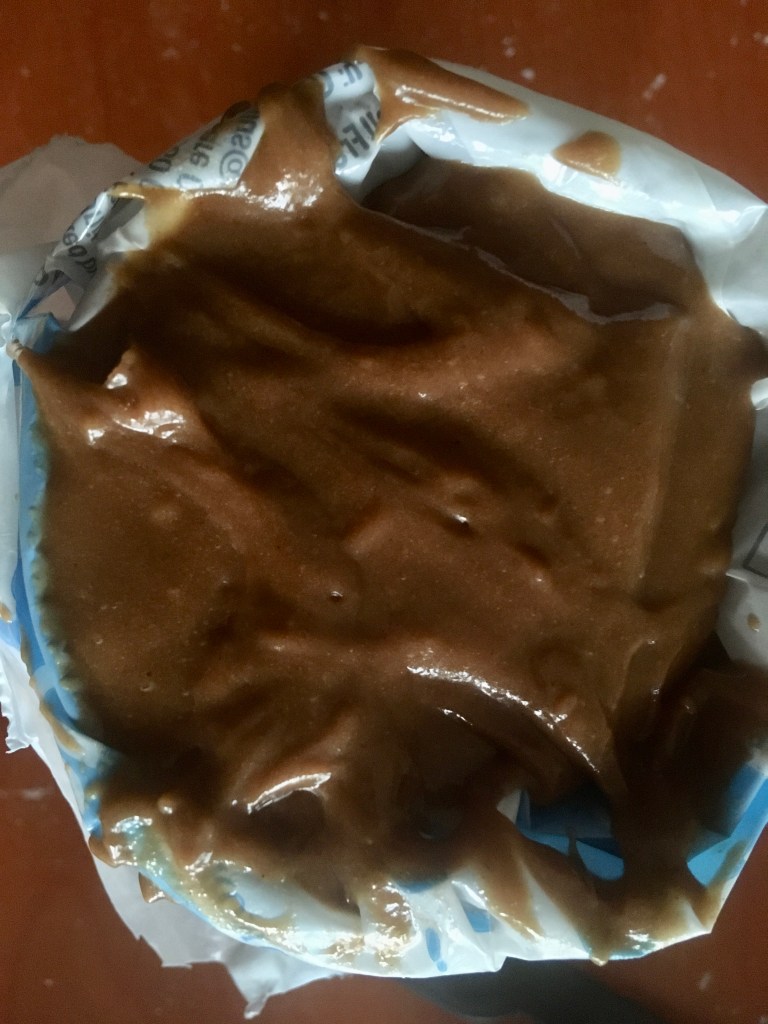
Transfer the batter into a pipping bag or a plastic cover.
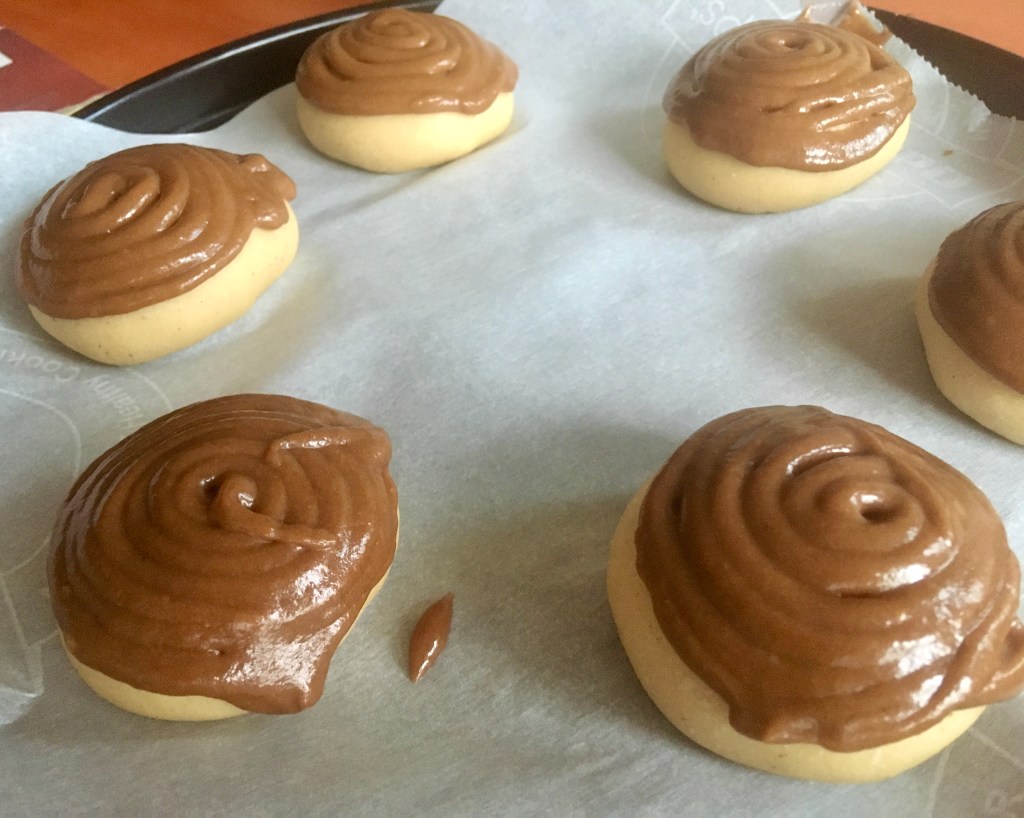
Cut the tip of the bag. Pipe the proofed bun half way through or full way down.
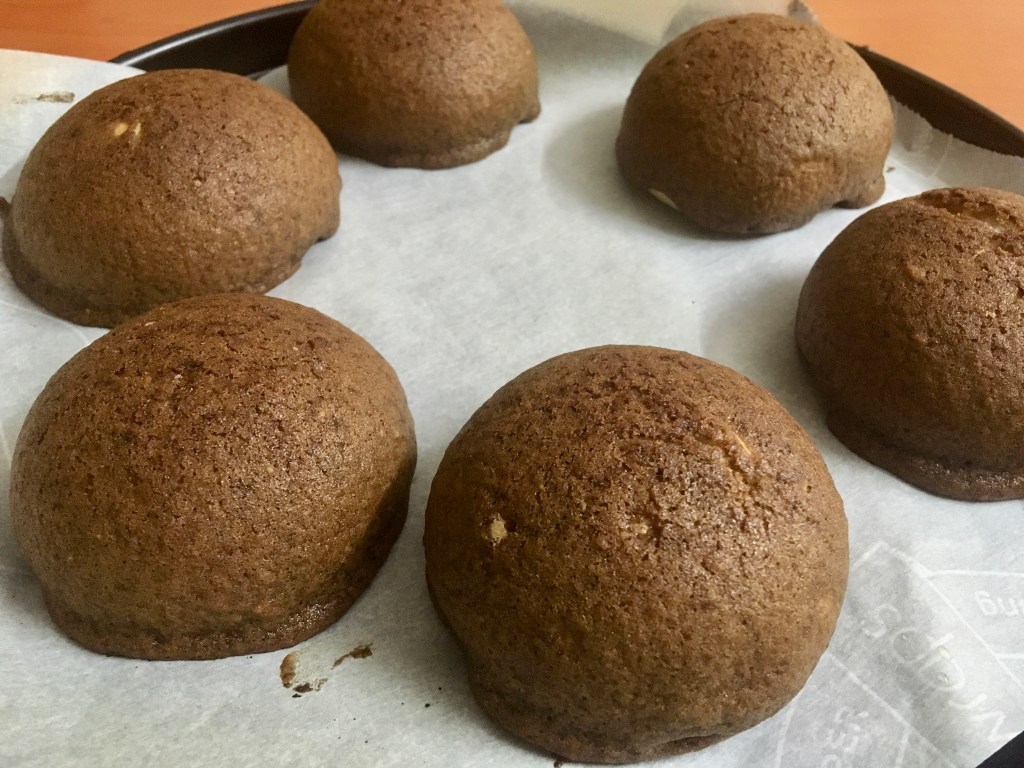
Meanwhile, preheat the oven at 180 degrees for 5 to 10 minutes. Place the tray with buns inside. Bake the buns at 180 degrees for 20 mins or until its done.
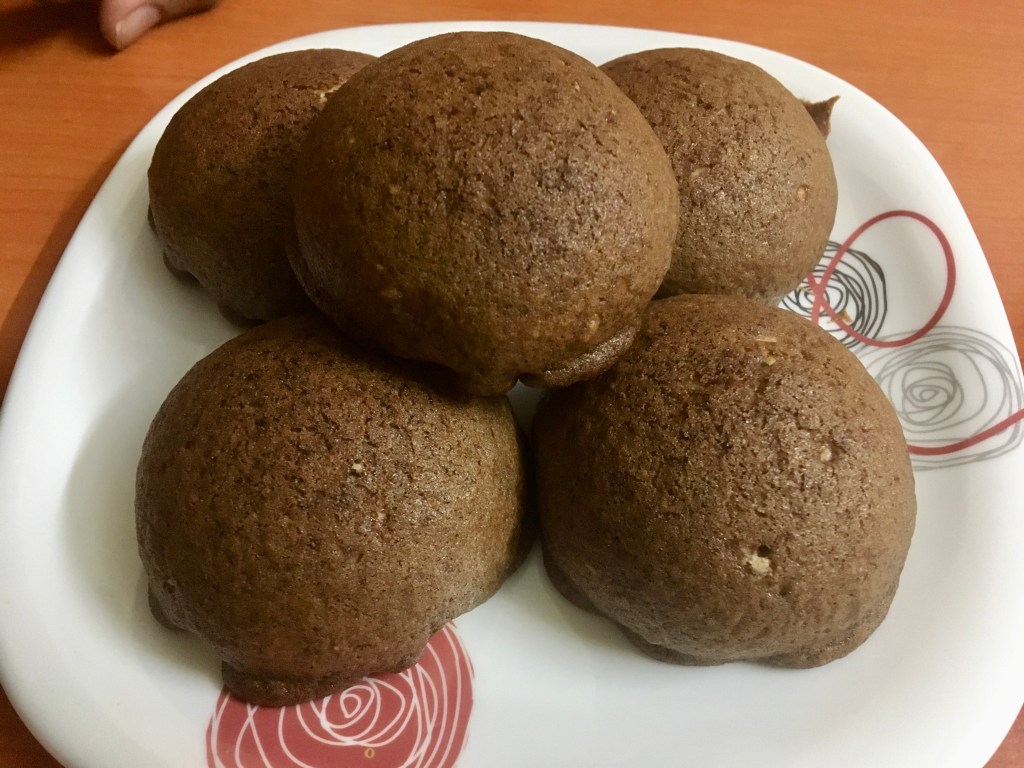
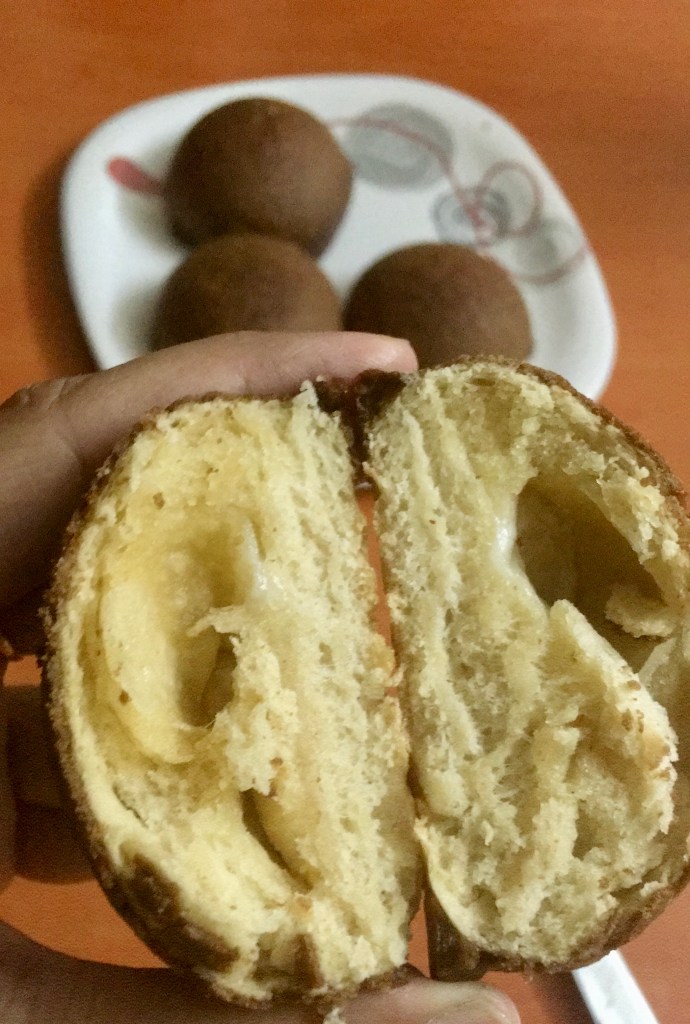
Once baked, if you are using the butter filling, there will be a cavity in the centre as shown in the picture below.
Best served with hot beverage of your choice during tea time.
TIPS: – the buns could be prepared using only milk or water (for vegan option); total 0.50 cup required. – if the buns are prepared with whole wheat only, the texture and taste may differ. Also the time taken to bake the buns will differs. – the water requirement to make the dough depends on the quality of the flours. – to knead the dough, spread some oil on the platform, use your palm and press it forward while stretching the dough. Fold and repeat the step multiple times. – alternative option for butter paper; spread generous quantity of butter on the surface of the tray, so that the dough doesn’t stick to the surface. – the filling could be prepared with only coco powder or coffee powder. Taste the filling, if additional coffee powder is needed as per your taste before filling it in the bag. – I have used milk packet for pipping bag; cut only one side and serves the purpose well. – also, the easy way to fill the pipping bag is to place the bag in a cup, spread the mouth of the bag and pour it in slowly into it. Tap once a while. Never cut the tip before filling. – alternative option for filling; you can use a big chunk of chocolate or jam or pipe in any sweet filling of your choice. Original Papparoti has butter filling in it.
Remember, the key is to keep trying different methods and experiment with it. Let me know in the comments below about your experiment with this recipe.
Please do like and share this recipe. Happy Baking!!!
It is summer time, and watermelon could be found in abundance. When I told my mom casually that I am eating the melon, she gave me this easy and tasty recipe with less efforts to prepare it. After that day, this is my go-to favourite recipe every summer. I didn’t find many recipes cooking with rind, so I thought I will post one.
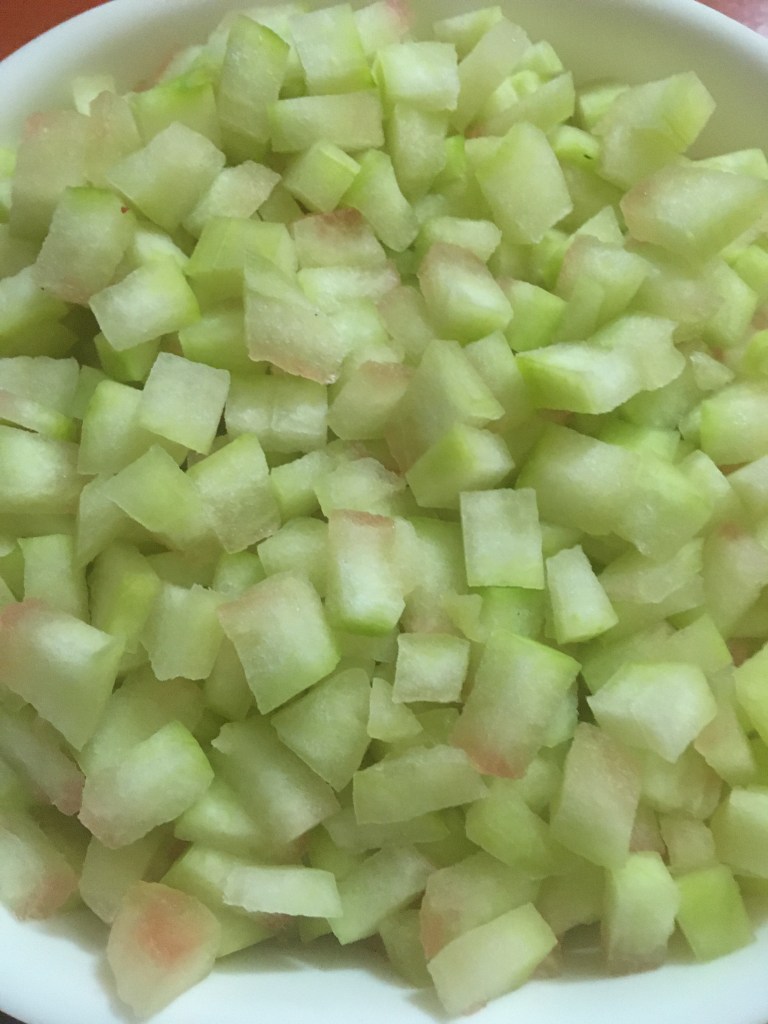
What is a watermelon rind? It’s that light green or white part just above the dark green skin of the melon (check picture below). Everyone throw away the watermelon rind and eat the sweet red part. But do you know the health benefits of the rind? It contains Vitamin A, B, potassium, magnesium and zinc (courtesy: Google). It doesn’t actually have any taste, which makes it easy to cook with it. It takes in the flavour that you add.
Don’t forget to check my tips after the recipe. Lets get cooking!!!
ingredients:
Watermelon rind – 4 cups (Chopped) Toor dal (split pigeon peas) – 0.75 cup Water as required for cooking (1 cup for rind and 2 cups for dal) Salt as per taste
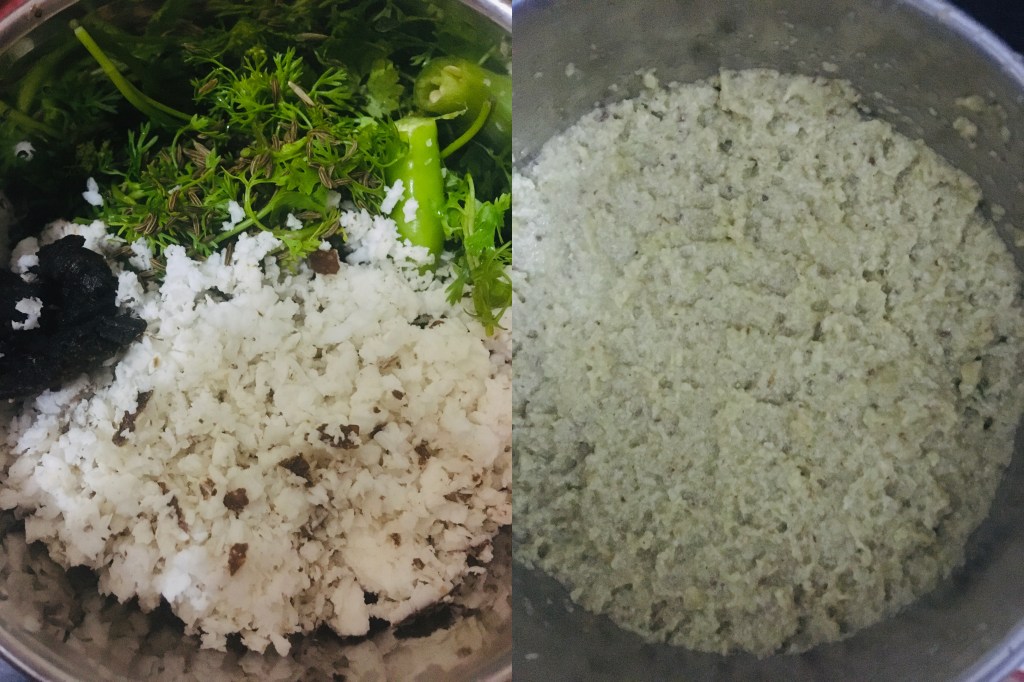
Ingredients for grinding: Coconut – 1 cup (grated) Green chilli – 3 Jeera seeds – 1 teaspoon Tamarind – 0.5 teaspoon Coriander leaves – few Water as required
Ingredients for tempering: Oil (coconut or cooking oil) – 1 teaspoon Black mustard seeds – 0.5 teaspoon Jeera seeds – 0.5 teaspoon Curry leaves – 10
Preparation:
Wash the watermelon rind, peel the dark outer skin and cut it into small cubes. Take it in a separate container. Add only 1 cup of water for 4 cups of watermelon rind. Add a pinch of salt to it.
Wash and take the dal separately in a different container. I have added 2 cups of water to cook the dal.
Cook the dal and watermelon in a pressure cooker for 4 to 5 whistles and switch off the heat.
Once the pressure cools off, open the cooker. Smash the dal well and keep it aside.
Meanwhile, take all the ingredients for grinding (coconut, green chilli, tmarind, jeera, coriander leaves) and grind it into a smooth paste consistency. Do not add excessive water.
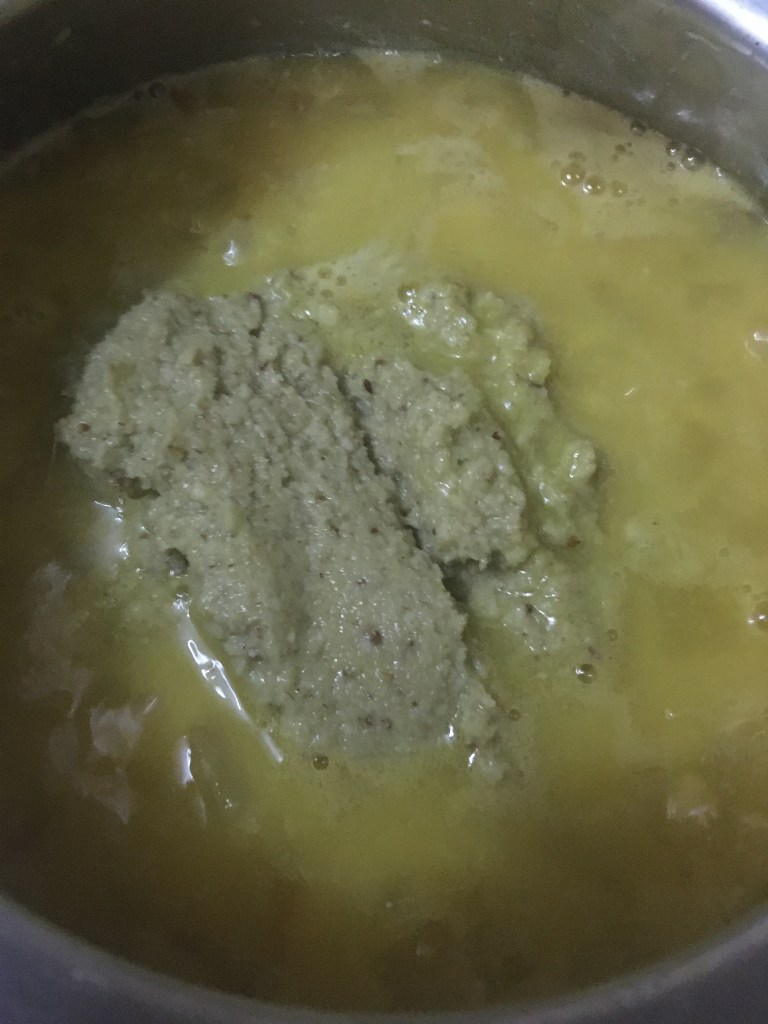
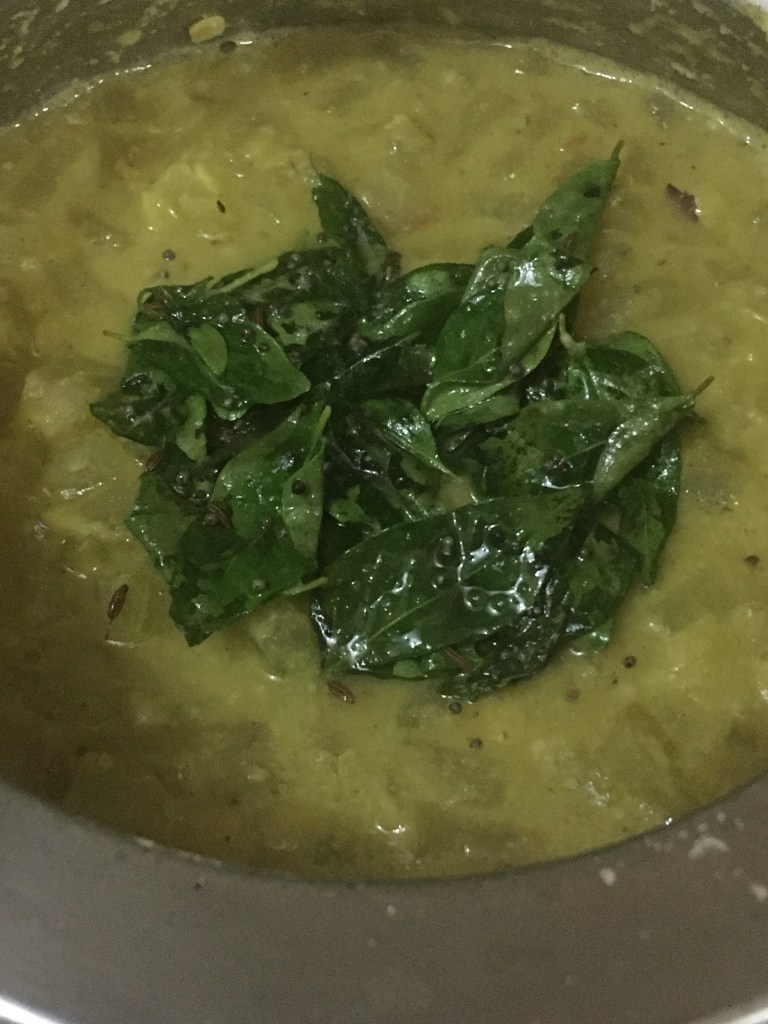
In a cooking pot, take the cooked rind with water in it and the smashed dal and mix well. No need to take any additional water. Switch on the heat, add the paste mixture and salt as per taste. Mix well and bring it to boil. Keep stirring so that it won’t get burnt.The consistency of the stew is thick and not watery.
Temper the ingredients mentioned under tempering and add to it. Mix well, bring it to boil and switch off.Ready to be served hot.
You can either have with chapati or plain rice.
Tips:
– Watermelon rind, just like watermelon fruit, contain lots of water, so do not take lots of water. When you cook the rind, there will be additional water that oozes out, which could be added to the stew. – While cutting the rind, you might get the pink part of the watermelon, that’s alright, it adds colour to your stew. – While cooking vegetables, it is important to add some salt to it. This helps the vegetables to soak the salt while cooking. – You can try the same recipe with banana stem or with any other vegetable of your choice, Let me know, how that turned out in the comments below. – the proportion of the ingredients may vary as per your taste, try it once and add more of the ingredients when you do again.
Remember, the key is to taste the dish at every stage and experiment with it. Let me know in the comments below about your experiment with this recipe.
Please do like and share this recipe. Happy Cooking!!!